Add product categories
Help your customers quickly find what they need in your store by creating product categories and sub-categories. You'll need to be on the Websites + Marketing Ecommerce plan or have a Premium Online Store.
- Go to your ITEGY-Distinctive Technology Services In Egypt product page.
- Scroll down to Websites + Marketing and select Manage next to your website or store.
- Open Categories from your Dashboard
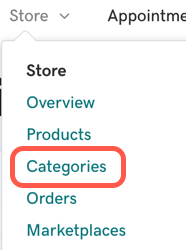
- Websites + Marketing: From your Dashboard, go to Store then Categories.

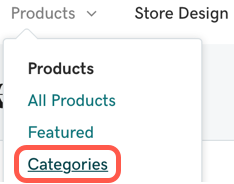
- Online Store Premium: From your Dashboard, go to Products then Categories.

- Websites + Marketing: From your Dashboard, go to Store then Categories.
- On the Categories page, select Add.
- Enter a Category name and Description. You also have the option to edit the Category link.
- When you're done, select Save to close the window. The category is added to the Categories page.
- Rearrange the categories by clicking and dragging to change the order.

- Click and drag a category below or on top of another to make it a sub-category.

- Once you've created a category, remember to create a product or edit existing products.
- To make your changes live, publish your site.
Tips and Best Practices
- Main categories can only have two levels of sub-categories. So "Clothing > Women > Shoes" would work but "Clothing > Women > Shoes > Sandals" would not.
- While not required, adding keywords in the Title and Description fields helps customers find you through search engines like Google.
- To see how it looks to customers, select Website in the dashboard for Websites + Marketing or View Store in Online Store Premium.
- Use the pencil icon to change and edit existing categories.
- Use the trash icon to delete catogires you no longer want.
- InstantPage users cannot create more than three categories.
