Create a group
Get started by creating a calendar group in your account.
You must have administrator permissions to create a group in Calendar.
- Log in to your Workspace Email account. (Need help logging in?)
- Click the Calendar tab.
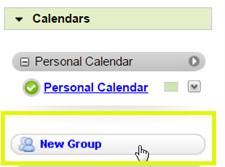
- In the left pane, under Calendars, click New Group.
- Fill in the Enter Group Name box, and click Next.
- In the Members dialog box, do one or more of the following to add members:
In the dialog box Do this Email Enter Calendar users' email addresses, select whether or not to grant each person administrator privileges, and then click Add. 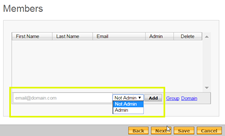
Group To add an entire group or one or more group members, click Group, select one or more groups from the list, select individual members, select whether or not to grant administrator privileges, and then click Add. 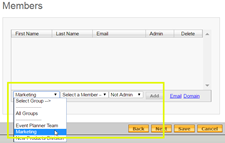
Domain To add all members of a domain, click Domain, enter the domain name in the box, and then click Add. 
All users with email addresses on that domain are added as members. As you add more users to that domain, they will be added automatically to the group.
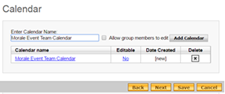
- In the Calendar dialog box, enter a name in the Enter Calendar Name box, select whether or not to allow group members to edit the group calendar, and then click Add Calendar. Repeat this process to add additional group calendars, and then click Next.
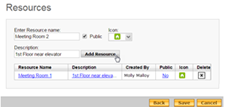
- In the Resources dialog box, fill out the Enter Resource name and Description fields, select whether or not the resource is to be made public, and then click Add Resource. Repeat this process to add multiple resources, and then click Save. For more information about resources, see Managing Calendar Resources.
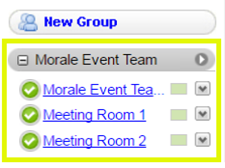
The calendar groups you create are available with resources in the left pane, under the New Group button.