Schedule a campaign to send later
You can create a Email Marketing campaign and schedule the mailing for a later date. This can be helpful when you want to create a group of campaigns at one sitting, and plan their release ahead of time.
Note: Before you get started, confirm your Time Zone settings.
- If you haven't already, log in to your Email Marketing account. (Need help logging in?)
- On the Campaigns page, on the campaign you want to schedule for a later mailing date, click the Schedule button.

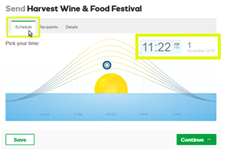
- On the Schedule tab, click inside the time box and set the time of your future mailing.

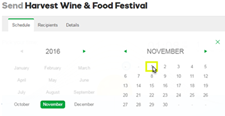
- Click the date box, and in the calendar that appears, click the planned mailing month and date, and click Save.

The date and time you select must be set in the future. If you receive error messages, double check your Time Zone settings.
- Click Continue.
- On the Recipients tab, click Include for each list you want to send the mailing to.
- Click the Exclude button only if contacts in different lists overlap, and you want to make sure the overlapping contacts do not receive the mailing.
For details about using the Include and Exclude buttons, see Including and excluding lists.
- Click Continue.
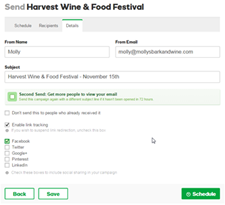
- On the Details tab, confirm your mailing details are correct, make final changes, and click Schedule.

- Once you've made the necessary changes, click Looks Good. Schedule it! and we will send it on the date and time you set.
In the Campaigns page, the clock button will appear red, indicating you've successfully scheduled your future mailing.
