Add logo to my website header
Since the header section appears on every page, adding a clean, simple logo can give your site added graphic punch. If you change your mind later on, you can switch logos or revert back to using text.
- Log in to your ITEGY account and open your product. (Need help opening your product?)
- Click Edit/Edit Site.
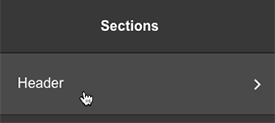
- In the Sections sidebar, click Header.
- Click the Logo panel.

- Click Upload Logo and browse to the image you want to use.
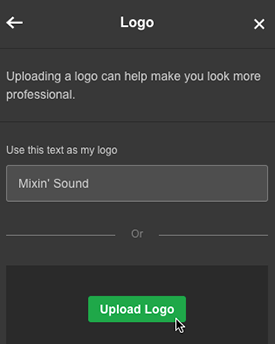
Note: You don't need to empty the text field when using a logo.
- Use the slider to adjust the logo's size.
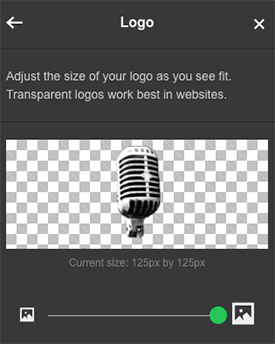
Note: A checked background means the image has a transparent background, which lets the header's background color show through.
- Your changes are saved automatically so when you're finished, click Preview to see the results, and, if you like, use another of your domains or buy a new one.
- When you're ready to make the changes public, click Publish Site or Publish.
Note: If you want to use another image or return to a text logo, click Remove Logo at bottom of the Logo panel.
