Add or replace photo
Great photos encourage visitors to explore your site, so use them liberally. They must be formatted as .png or .jpeg/.jpg files. While they can be as large as 30MB, smaller files download faster.
Note: To add or change product photos in your Website Builder Online Store, see Add products.
- Log in to your ITEGY account and open your product. (Need help opening your product?)
- Click Edit/Edit Site.
- Click the photo you want to replace.
- To add or replace the first section's cover image (or solid color), click anywhere in the section. When the Header panel opens, click Cover Image.
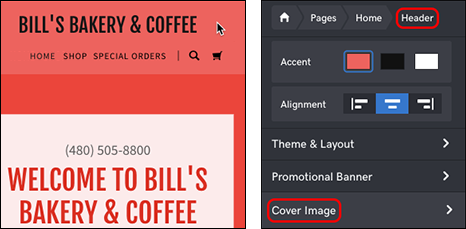
- In other sections, click where you want to add an image or click the photo you want to replace. (You cannot do this in the Contact Us or Footer sections.)

- To add or replace the first section's cover image (or solid color), click anywhere in the section. When the Header panel opens, click Cover Image.
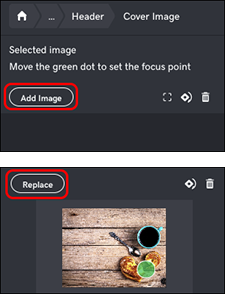
- In the right panel:
- Click Add Image.
- Click Replace to use another photo.
- The Image Library offers multiple ways to select a photo.
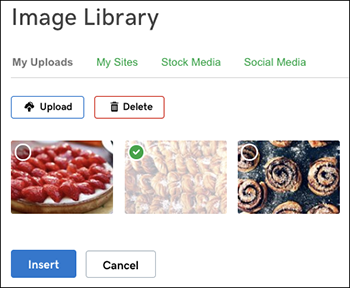
Click To : My uploads
(default view)Select a photo from ones you've already uploaded to your site Upload Browse to a new photo on your computer to upload to your site My Sites Use a photo from another Website Builder site you've created Stock Media Select one of Website Builder's royalty free photos (For details, see Choose stock photo.) Social Media Select photos posted on your Facebook account. You need to log into Facebook to chose those photos. Delete Move selected photo to the trash - After making your choice, click Insert.
- When the Selected image panel opens, edit the photo by clicking the crop or rotate buttons. Use the slider and green dot to set the photo's zoom level and focus point. (Click the trashcan to delete a previously uploaded photo.)
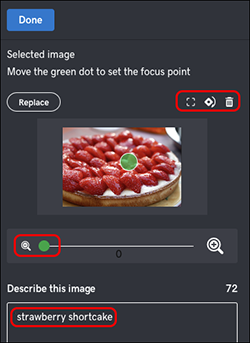
- Enter a short description in the Describe this image box. The info not only improves your page's search engine rank, but also helps site visitors using screen readers or slower connections.
- When you finish editing, click Done. Your new or replacement photo appears in the section you selected in Step 3.

Next steps
- Don't have quite the right photo? See Choose stock photo and search by keywords.
- Want a less busy header? See Replace cover photo with solid color.
