Create or change blog categories
By creating blog categories and assigning them to posts, you can control where individual posts appear. You can create the categories on the fly, as well as change them later on.
Note: Before diving into creating categories, you need to Add a blog to my website and Create blog posts.
- Log in to your ITEGY account and open your product. (
- Click Edit/Edit Site.
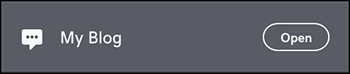
- Click Open in the My Blog panel.
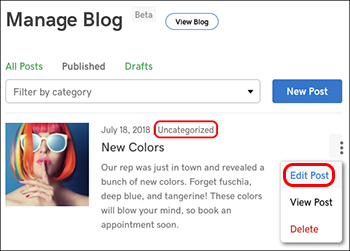
- When the Manage Blog window appears, find the post you want to categorize, click the three-dot button next to that post and choose Edit Post.
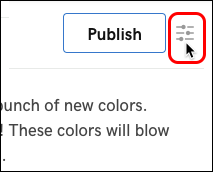
- Click the settings button next to the post's Publish button.
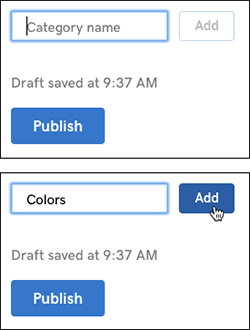
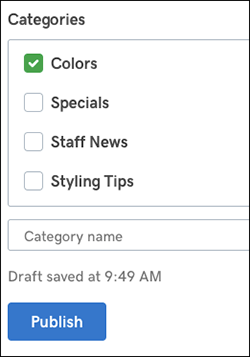
- Enter your first category in the Category name field and click Add.
- Repeat Step 6 if you want to add more categories immediately (or come back to this step later).
- Select the category (or categories) you want to apply to the post.
Note: If you want to continue categorizing other posts before publishing, click Posts in main window to return to the Manage Blog window.
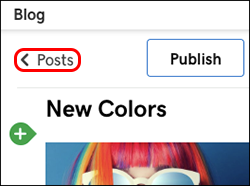
- When you're done categorizing, click Publish. (A Published! confirmation window appears briefly then closes automatically.)
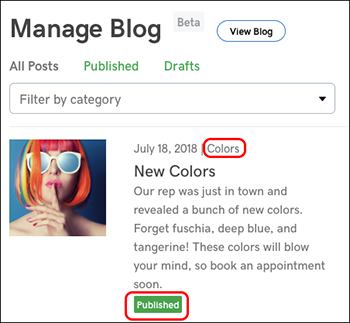
- Click Posts in upper left, and when the Manage Blog window appears, the now-published post displays the assigned category or categories.
Next step
- Now that you've got categories, take it to the next level: Create multiple blogs on my site.
