Add an image gallery using Page Builder in WordPress
Page Builder allows you to organize your images and photos into categories by creating galleries.
- Open Page Builder in WordPress.
- Click Advanced Modules in the right sidebar.
Note: If the sidebar is not visible or disappears, click Add Content in the top toolbar to show it again.
- Click the Gallery button and drag it in a single, smooth action to a place on the page.
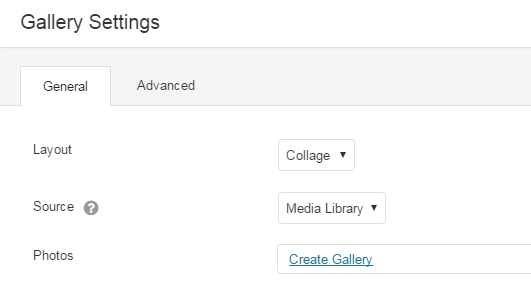
- The Gallery Settings dialog appears, use the Layout to choose Collage or Thumbs.
- From the Gallery Settings dialog box, use the Source to choose Media Library or SmugMug.
If you choose Then Media Library Click one of the Add to Gallery tabs. Click on the images or photos you want to display in the gallery. 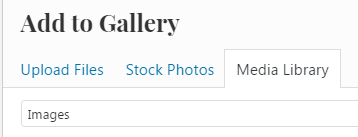
SmugMug Insert SmugMug RSS into the Feed URL field. For more information on finding the RSS feed, see Share my photos. - Click Add To Gallery, located on the bottom right hand corner.
- Click Update Gallery.
- Use the remaining fields in the Gallery Settings dialog box as needed.
General Gallery Settings Photo Size You can display your photos in 3 different sizes; large, medium and small. Photo Spacing You have the capability to space your photos in pixels. Show Captions You have three choices to display you photo captions; on hover, below the photo or not at all. Click Action Photo click actions available are Lightbox or Photo Link. - Click Save.
- If you want to make changes to your gallery in other ways, see Change gallery settings using Page Builder in WordPress.
- Click Done, located on the top-right corner.
- Click Publish Changes. If you do not want these changes to go live yet, click on Save the Changes and Exit option.
