Change the table prefixes
Note: This is the fifth step in manually migrating a WordPress site to your Pro Managed WordPress account. If you don't have a Pro Managed WordPress account, you can learn more about them here.
| Part 1: Copy the wp-content folder | Part 2: Make an SQL dump file |
| Part 3: Upload the site content | Part 4: Update the site database |
| Part 5: Change the table prefixes | Part 6: Make final edits |
This next step in manually moving a WordPress site to a Pro Managed WordPress account: Change table prefixes in the WordPress site database. You need to use phpMyAdmin to change the prefixes. Give yourself 10-15 minutes for this part.
Note: At the end of Part 4, you checked the table prefix in the site database. If that table prefix is not "wp", continue with the rest of this article. If that table prefix is "wp", skip this part and continue with Part 6.
- If you still have the phpMyAdmin page open for the site, continue with the next step. Otherwise, open phpMyAdmin for the Pro Managed WordPress site.
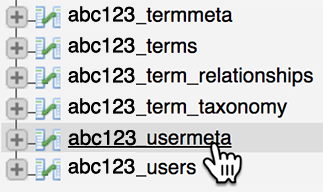
- In the list of tables, click the table name ending in usermeta.
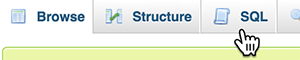
- Click SQL.
- Highlight and delete the current code in the editing window.
- Copy and paste this code in the editing window:
UPDATE 'tablePrefix_usermeta' SET 'meta_key'= REPLACE ('meta_key', 'wp_', 'tablePrefix_') WHERE 'meta_key' LIKE 'wp_%'
- Replace tablePrefix with the table prefix you copied earlier. Be careful not to delete the underscore character after the table prefix. In our example, this code looks like:
UPDATE 'abc123_usermeta' SET 'meta_key'= REPLACE ('meta_key', 'wp_', 'abc123_') WHERE 'meta_key' LIKE 'wp_%' - Click Go. The usermeta table is updated.
- In the list of tables, click the table name ending in options.
- Click SQL, and then remove the existing code again.
- Copy and paste this code in the editing window:
UPDATE 'tablePrefix_options' SET 'option_name' = REPLACE ('option_name', 'wp_', 'tablePrefix_') WHERE 'option_name' LIKE 'wp_%' - Replace tablePrefix with the table prefix you copied earlier. Be careful not to delete the underscore character after the table prefix.
- Click Go. The options table is updated.
- Close the phpMyAdmin page, but hang on to the table prefix - you'll need that in the next part. The last part!
Note: If your original WordPress database had a table prefix other than wp_, then you should replace the first wp_ in the code sample with the original prefix. However, the wp_% should never be changed.
