Copy my wp-content folder
Note: This is the first part of manually migrating a WordPress site to your Pro Managed WordPress account. If you don't have a Pro Managed WordPress account, you can learn more about them here.
| Part 1: Copy the wp-content folder | Part 2: Make an SQL dump file |
| Part 3: Upload the site content | Part 4: Update the site database |
| Part 5: Change the table prefixes | Part 6: Make final edits |
The first part of manually migrating your WordPress site to your Pro Managed WordPress account: Copy the wp-content folder for the site you want to move, and download that copy to your computer. This part should take five to ten minutes.
How you do this depends on your current host. For example, if you have a cPanel hosting account, you can use File Manager, or an FTP client. This procedure assumes that you (like many WordPress users) are using cPanel.
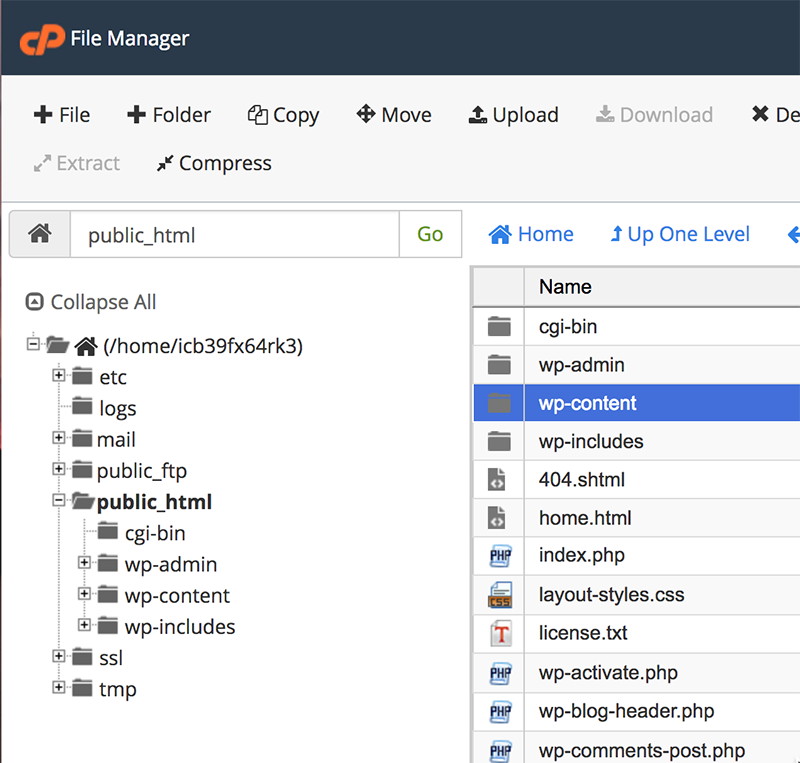
- In the cPanel hosting account for your WordPress site, open File Manager.
- Expand the directory tree on the left. The wp-content folder for the site is located in the public_html folder.
- Click public_html and then click wp-content in the list on the right.
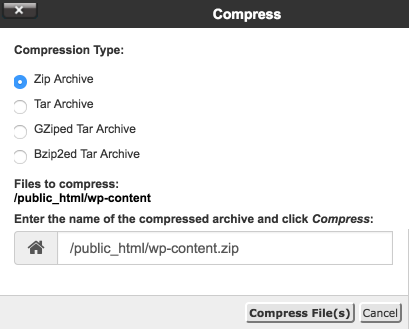
- Click Compress, select Zip Archive as the Compression Type, and then click Compress Files.
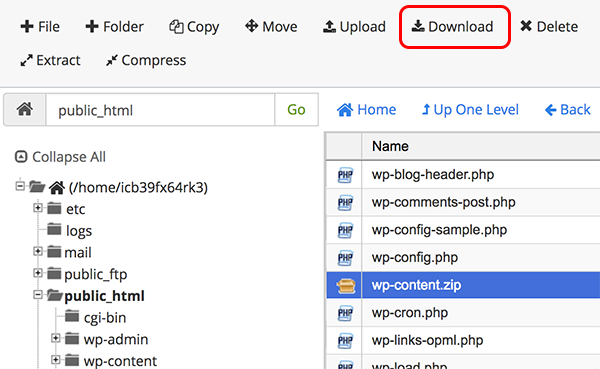
- After File Manager makes the Zip file, close the Compression Results box, and you should see the new Zip file in the list. If not, click Reload to refresh the list.
- Click wp-content.zip and then click Download. The Zip file is copied to the default download location on your computer.
- On your computer, find that file and double-click it to unzip it.
Next step
- Part 2: Make an SQL dump file
