Make final edits to my WordPress site files
Note: This is the sixth and final step in manually migrating a WordPress site to your Pro Managed WordPress account. If you don't have a Pro Managed WordPress account, you can learn more about them here.
| Part 1: Copy the wp-content folder | Part 2: Make an SQL dump file |
| Part 3: Upload the site content | Part 4: Update the site database |
| Part 5: Change the table prefixes | Part 6: Make final edits |
This is the final step to manually migrate a WordPress site to a Pro Managed WordPress account. Give yourself five to ten minutes to complete this step.
Note: If you did not have to change the table prefixes as described in Part 5, start with Step 7 in this article. Otherwise, start with Step 1.
- Open FileZilla and connect to the site using your sFTP credentials (remember, you got these back in this step.
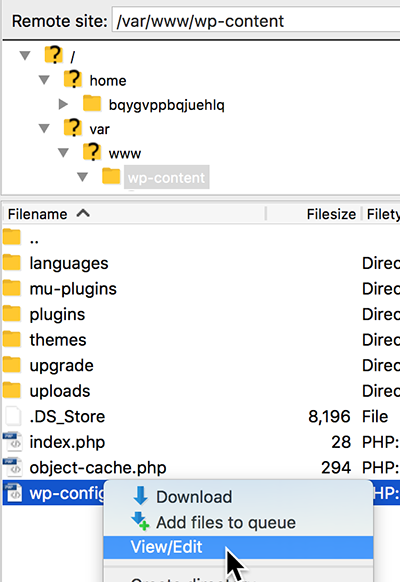
- In the Remote site field, type /var/www/wp-content and press Enter.
- In the list of files, right-click wp-config.php and select View/Edit. The .php file opens in your default editor; if you need to select the application used to edit this file, select a text editor.
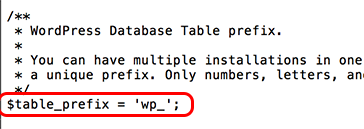
- Look for the line '$table_prefix = 'wp_';.
- Replace wp with the table prefix you copied in Part 5. In this example, the table prefix is abc123.
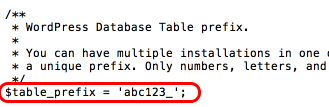
Note: Be careful not to delete the underscore character that follows the table prefix.
- Save the file. If you're asked to overwrite the file, agree.
- Open an SSH application and connect to the site. You'll need your Host, Username, and Password credentials again.
[On Mac, use Terminal: ssh username@hostname, and then enter your password when prompted.]
- After you sign in and establish the SSH connection, enter: wp search-replace 'oldurl' 'newurl' --dry-run, where:
- oldurl is the complete URL (including "http://" or "https://") for the original site you are migrating into the Pro Managed WordPress account.
- newurl is the complete URL (including "http://" or "https://") for the Pro Managed WordPress site you created for the migration, even if it's a temporary URL.
- --dry-run tells WordPress to run the command and report the results - but doesn't actually change anything in the database. This way we can check to make sure you've gotten the URLs right, and if there's an error you won't break anything.
- Press Enter to run the command. It'll take a few seconds for WordPress to finish the work. On success, you'll see how many changes are going to be made to the database tables.
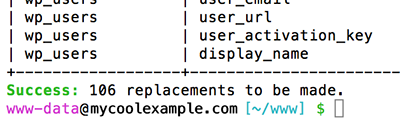
Note: If you get a success message, but it says 0 replacements will be made, check both of the URLs again, and then repeat the previous step. The URLs must be completely accurate or this command will not work.
- If you got the success message and it noted that more than 0 replacements will be made, enter: wp search-replace 'oldurl' 'newurl', where oldurl and newurl are the complete URLs for the old and new sites as described earlier.
- Press Enter. WordPress completes the search-and-replace, and revises the database. On success you'll see the number of changes that were made.
- Log in to the WordPress site and verify that everything looks as expected.
Note: Make sure the URLs you use in this command exactly match the URLs for the migrated site and the new site.
Note: There may be layout changes you need to revise in the WordPress editor.
