Update the site database
Note: This is the fourth step in manually migrating a WordPress site to your Pro Managed WordPress account. If you don't have a Pro Managed WordPress account, you can learn more about them here.
| Part 1: Copy the wp-content folder | Part 2: Make an SQL dump file |
| Part 3: Upload the site content | Part 4: Update the site database |
| Part 5: Change the table prefixes | Part 6: Make final edits |
The next step you need to complete to manually migrate a WordPress site to a Pro Managed WordPress account: Update the WordPress site database. We'll use phpMyAdmin to get this done. Give yourself five to ten minutes to complete this part.
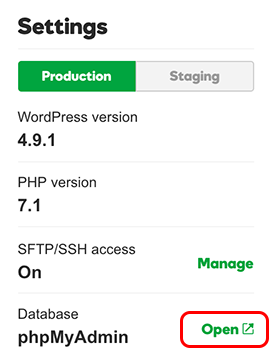
- Go to the Settings page for the new Pro Managed WordPress site:
- In your My Products page, next to Managed WordPress, click Manage All.
- Click the three-dot icon for the Pro Managed WordPress site and select Settings.
- In the Settings section, next to phpMyAdmin click Open. We'll take you straight to the phpMyAdmin main page for the site.
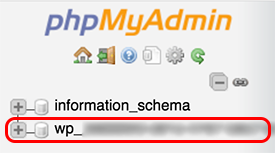
- Click the site database in the list (probably looks like wp_[long-file-name]).
- A list of database tables appears on the right. Scroll to the bottom of the list, select Check all, and then select Drop in the menu on the right.
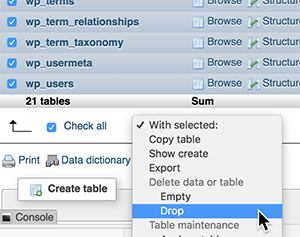
- When you're asked Do you really want to execute the following query?, click Yes. The application removes the tables from the database.
- In the top menu bar, click Import.
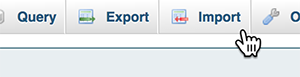
- Click Choose File, browse to the .sql file you saved in an earlier step, and double-click to select it.
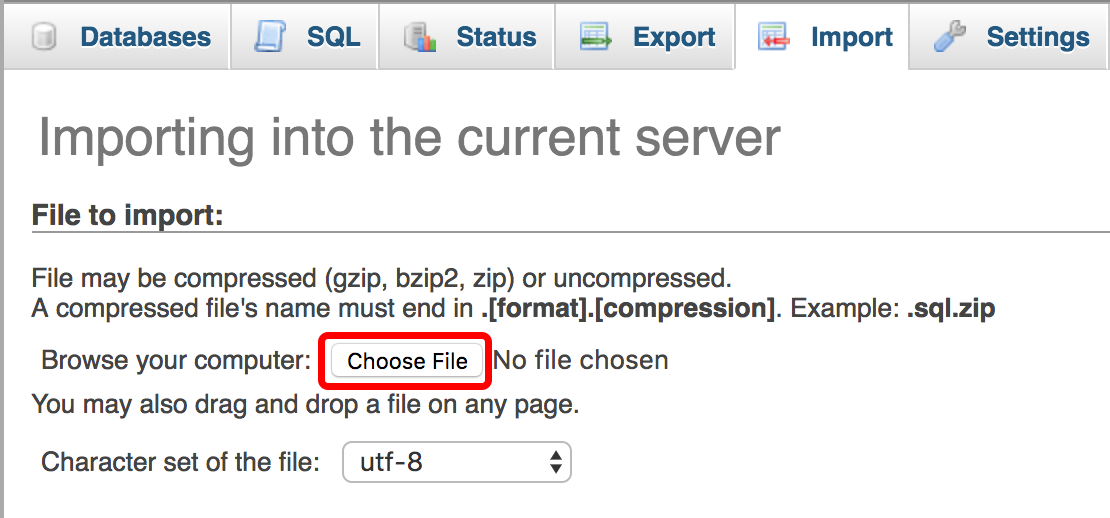
- Click Go. The application imports your SQL dump file and repopulates the list of tables.
- Click the plus sign next to the database name to see the list of tables in the database, and look at the name of the first table in the list.
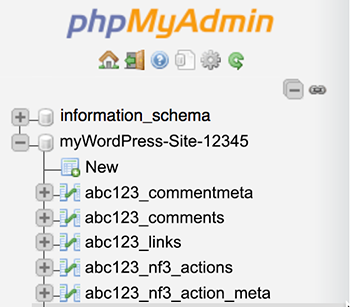
In this example the table name is abc123_commentmeta.
The table prefix is all the characters in the table name up to but not including the last underscore ( _ ) character. The table prefix here is abc123. If the table name was wp_123_456_789_commentmeta, then the table prefix would be wp_123_456_789.
