Install WHMCS
As of December 2014, Reseller Hosting is no longer available to purchase. If you wish to use WHMCS with your new server, you will need to purchase a license directly from WHMCS, and use their instructions to install it on your server. If you still have Reseller Hosting, you can still use this service for as long as you have the server.
This article assumes you have already purchased a Linux VPS with CentOS and cPanel/WHM.
This article is provided as a convenience and provides a very basic guide to getting your server configured with WHMCS. There are certainly other ways to get WHMCS installed and we strongly recommend using docs.whmcs.com as a reference.
First, you need to set up your Virtual Private Server (VPS). For more information, see Set up your server.
Once your server provisions, you need to configure cPanel®/WHM so that it works properly with WHMCS. You also need to create a reseller account within cPanel, and then configure WHMCS so that you can offer hosting packages for resale.
Grab some coffee. This process can take about an hour.
What you need:
- FTP client — for more information, see What is FTP?
- SSH client — for more information, see Connect to my Web Hosting account with SSH (Secure Shell)
- DNS control
- Knowledge of cPanel/WHM preferred
There are a few settings you need to reference during the setup process. Throughout this guide, these settings display in green text. To expedite setup, copy and paste this table into a document to help keep track of the multiple user names and passwords you are going to create:
| Server IP Address: | |
| Reseller User Name: | |
| Reseller Password: | |
| Nameserver 1: | |
| Nameserver 2: | |
| Package Name: | |
| Database Name: | |
| Database User Name: | |
| Database Password: | |
| WHMCS License Key: | |
| Server Hostname: | |
| WHMCS User Name: | |
| WHMCS Password: | |
| Cron Job Command: |
1. Setting up WHM
WebHost Manager (WHM) is a Web-based control panel you use to manage your server. Make sure you have your Server IP address ready before you try to log in. You can find your server's IP address in the Control Panel in your server account.
This procedure explains how to log in to WHM for the first time and includes some post-installation steps. You only need to perform these steps once.
For more information about WHM, see http://cpanel.net.
To Set up WHM
- Log in to WHM. Open a Web browser and go to:
https://ipaddress:2087/ (where ipaddress is your server's IP address). - When the WHM login screen displays, enter root as the user name and the password you defined when you set up your server account, and then click Log in.
- When you log in for the first time, WHM walks you through a wizard to help you set up your server. The End-User License Agreement for cPanel displays on the right. Review the license agreement, and then click I Agree/Go to Step 2.
- In the Server Contact E-Mail Address field, enter an administrative email address for this server, and then click Save & Go to Step 3.
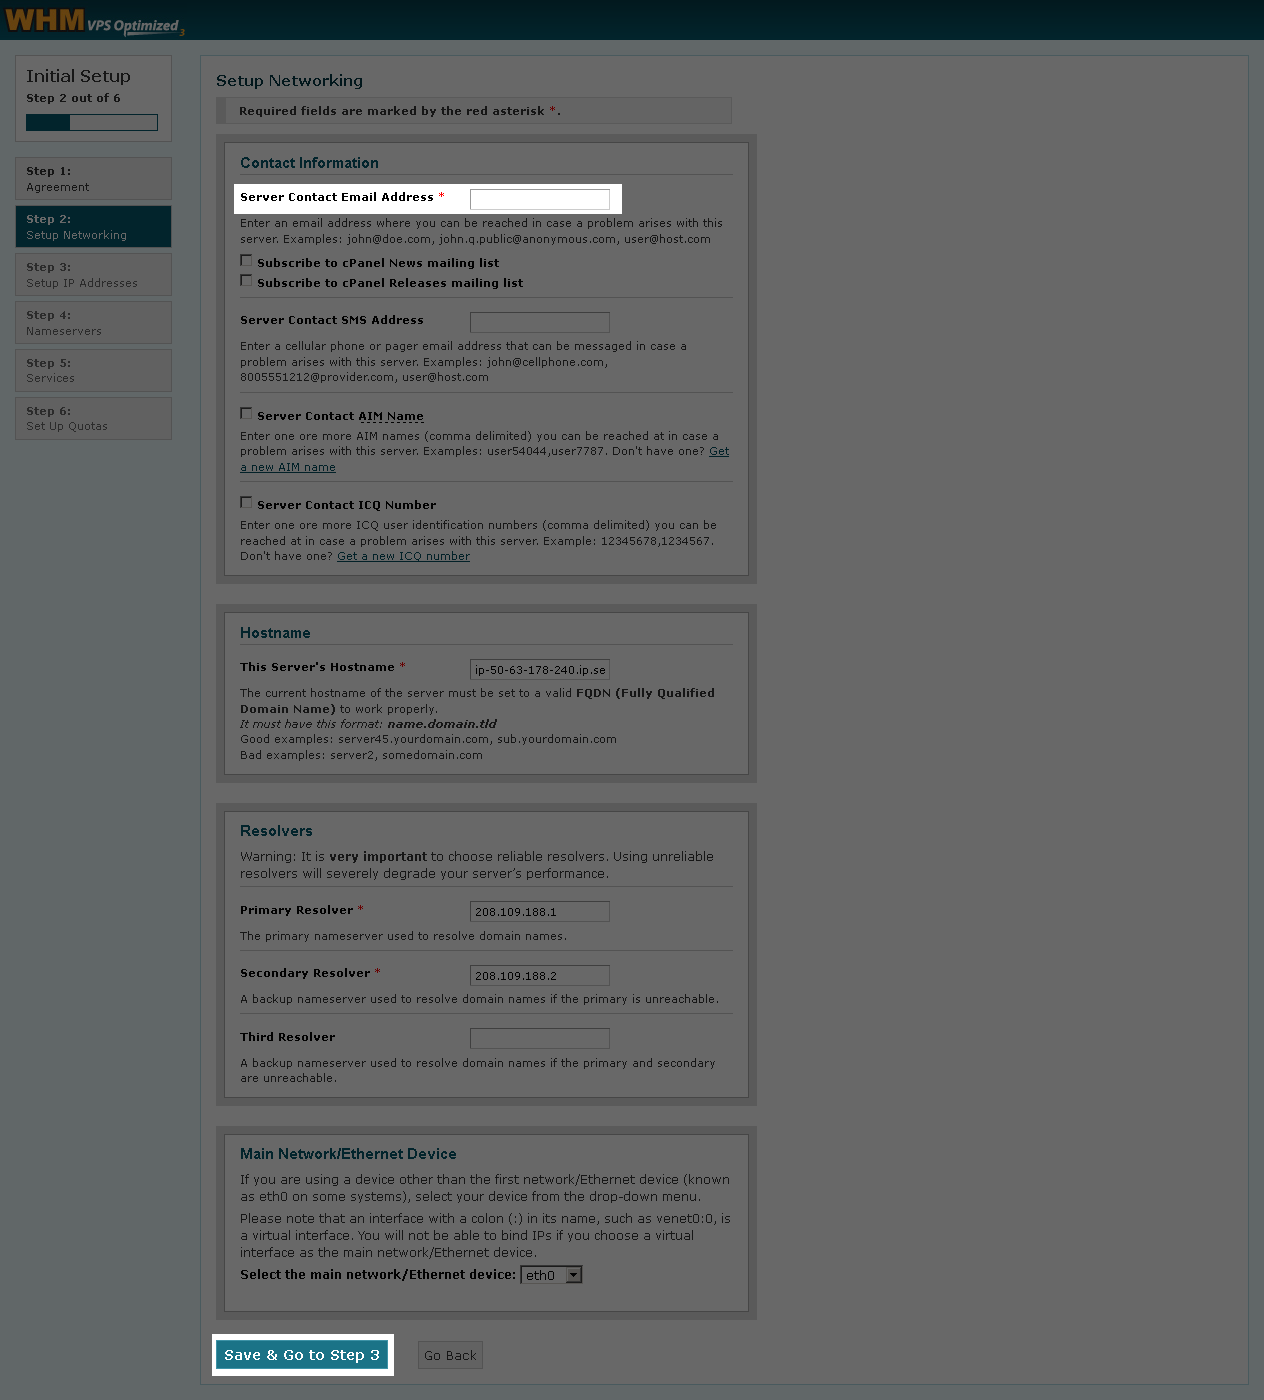
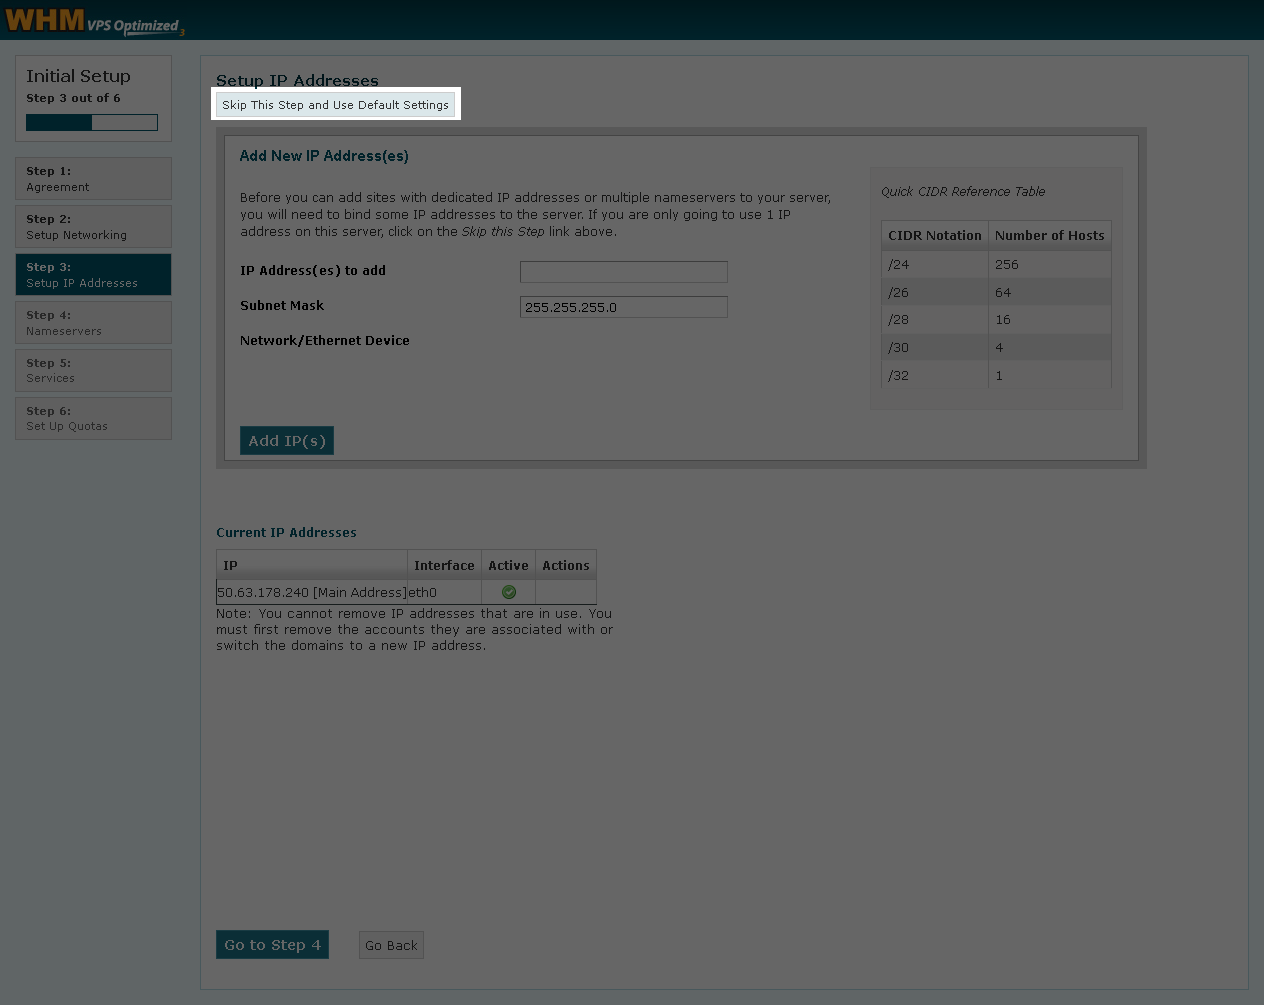
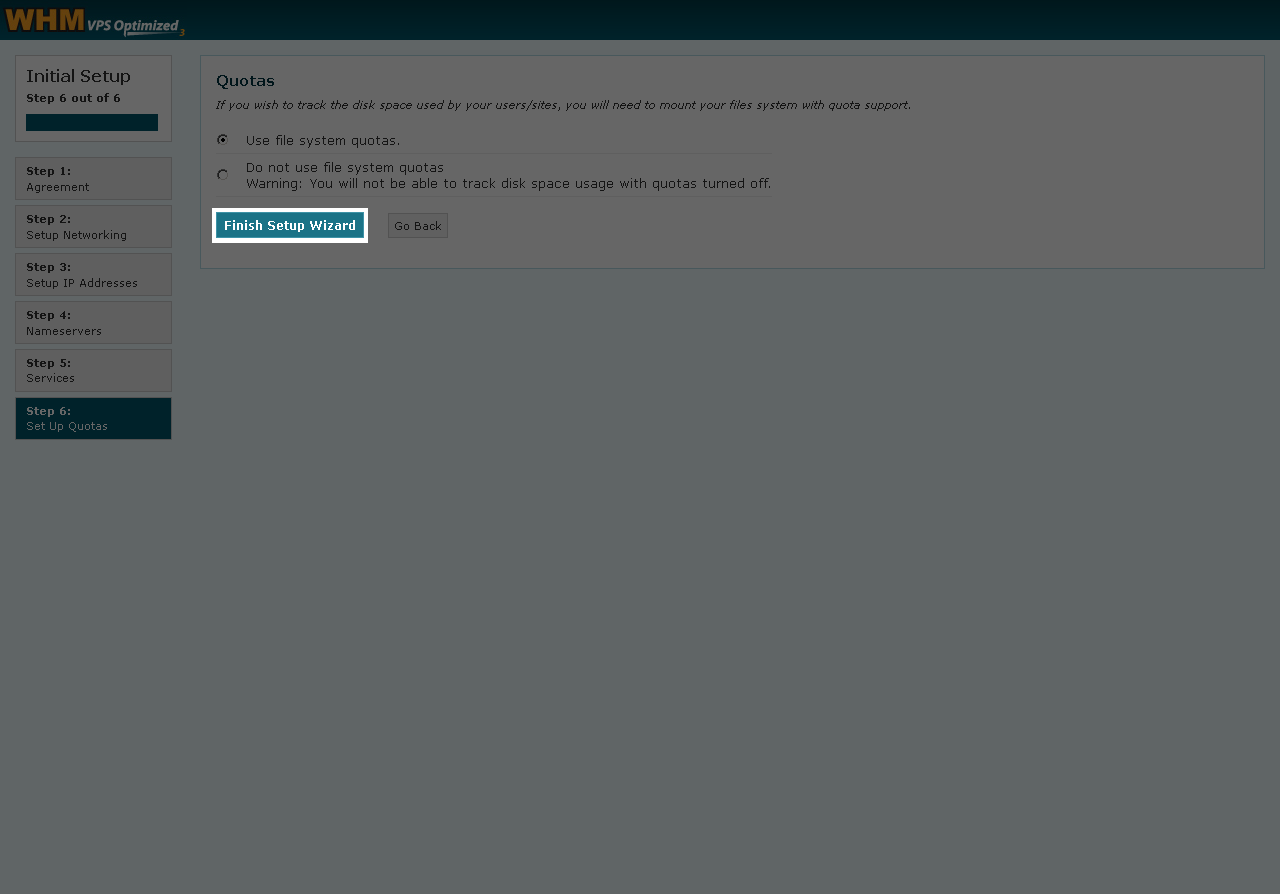
- Click Skip This Step and Use Default Settings.
- In the Choose which nameservers domains on this server will use section, you can use the default nameservers. Save these as Nameserver 1 and Nameserver 2, because you need them later.
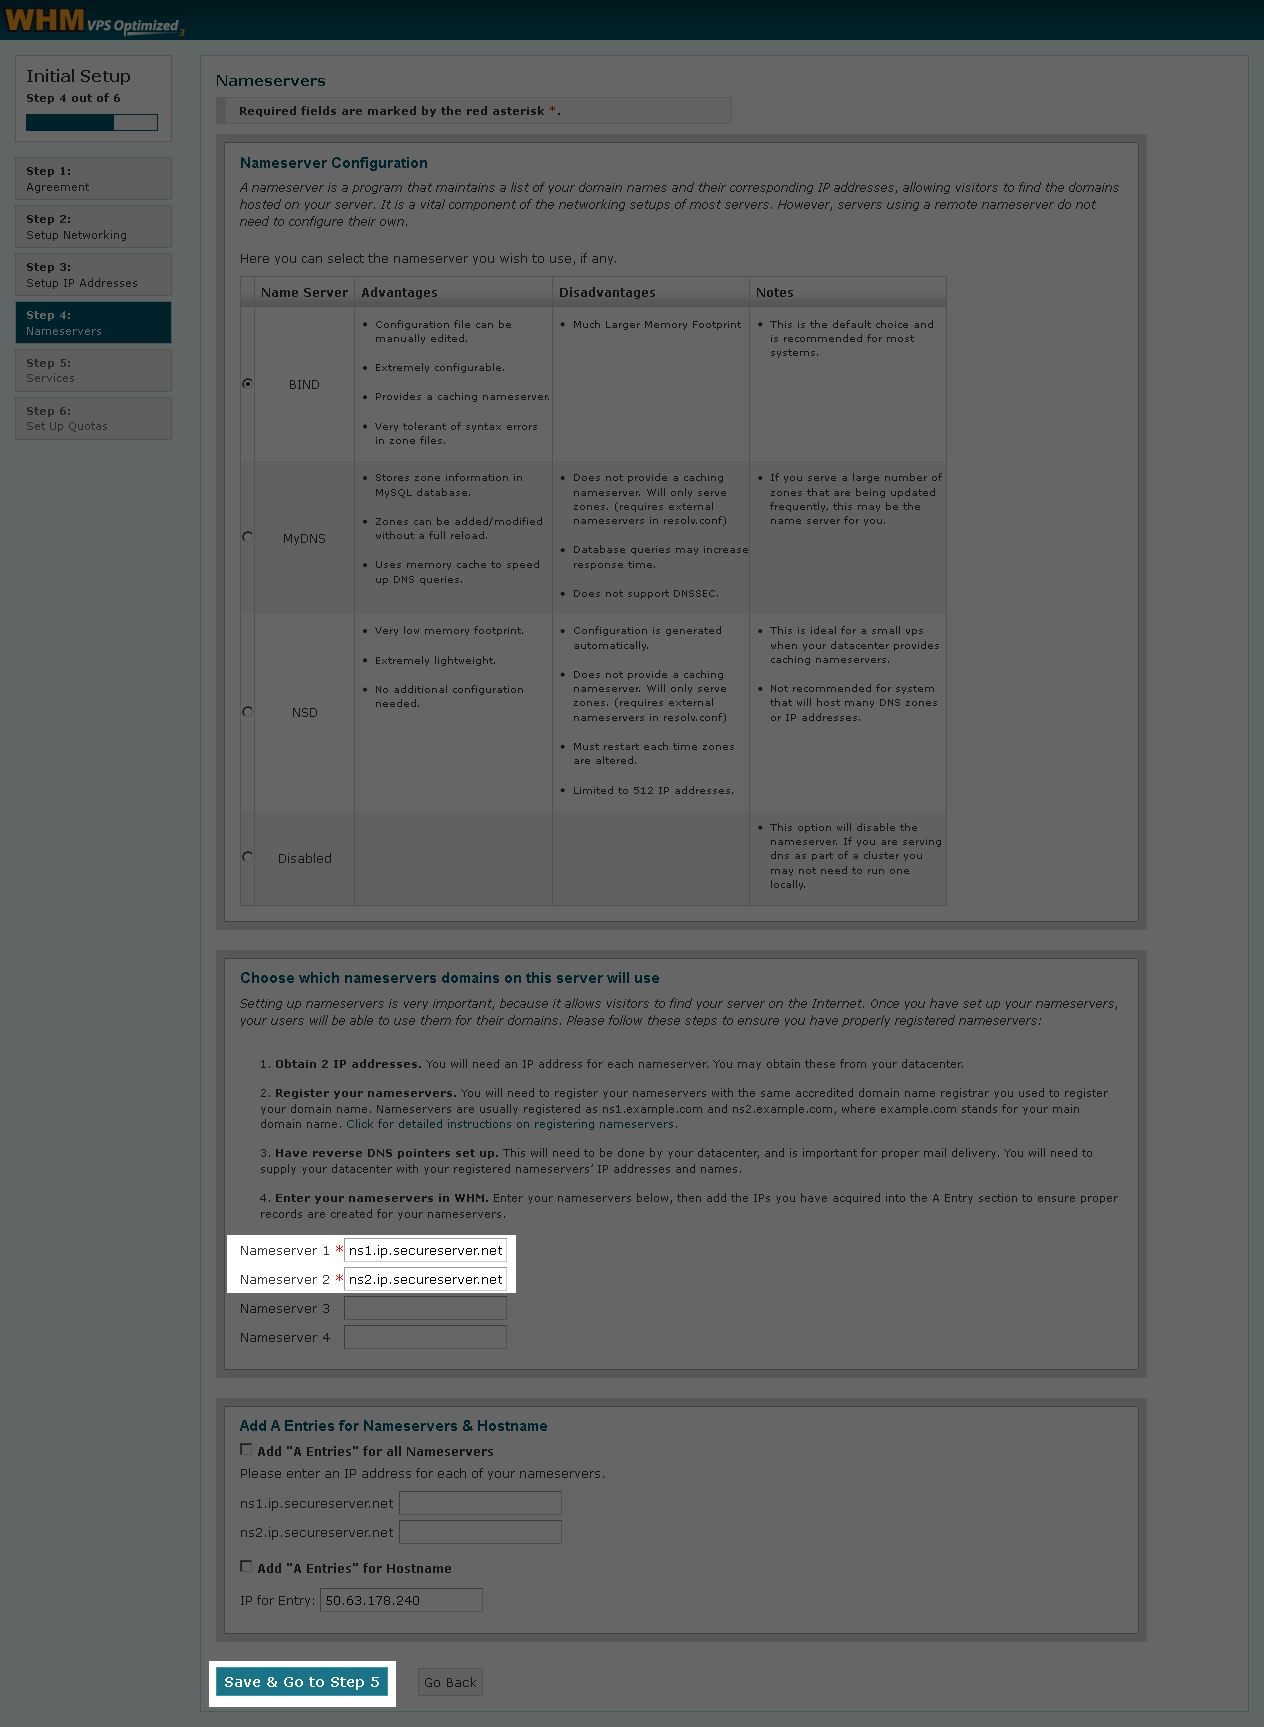
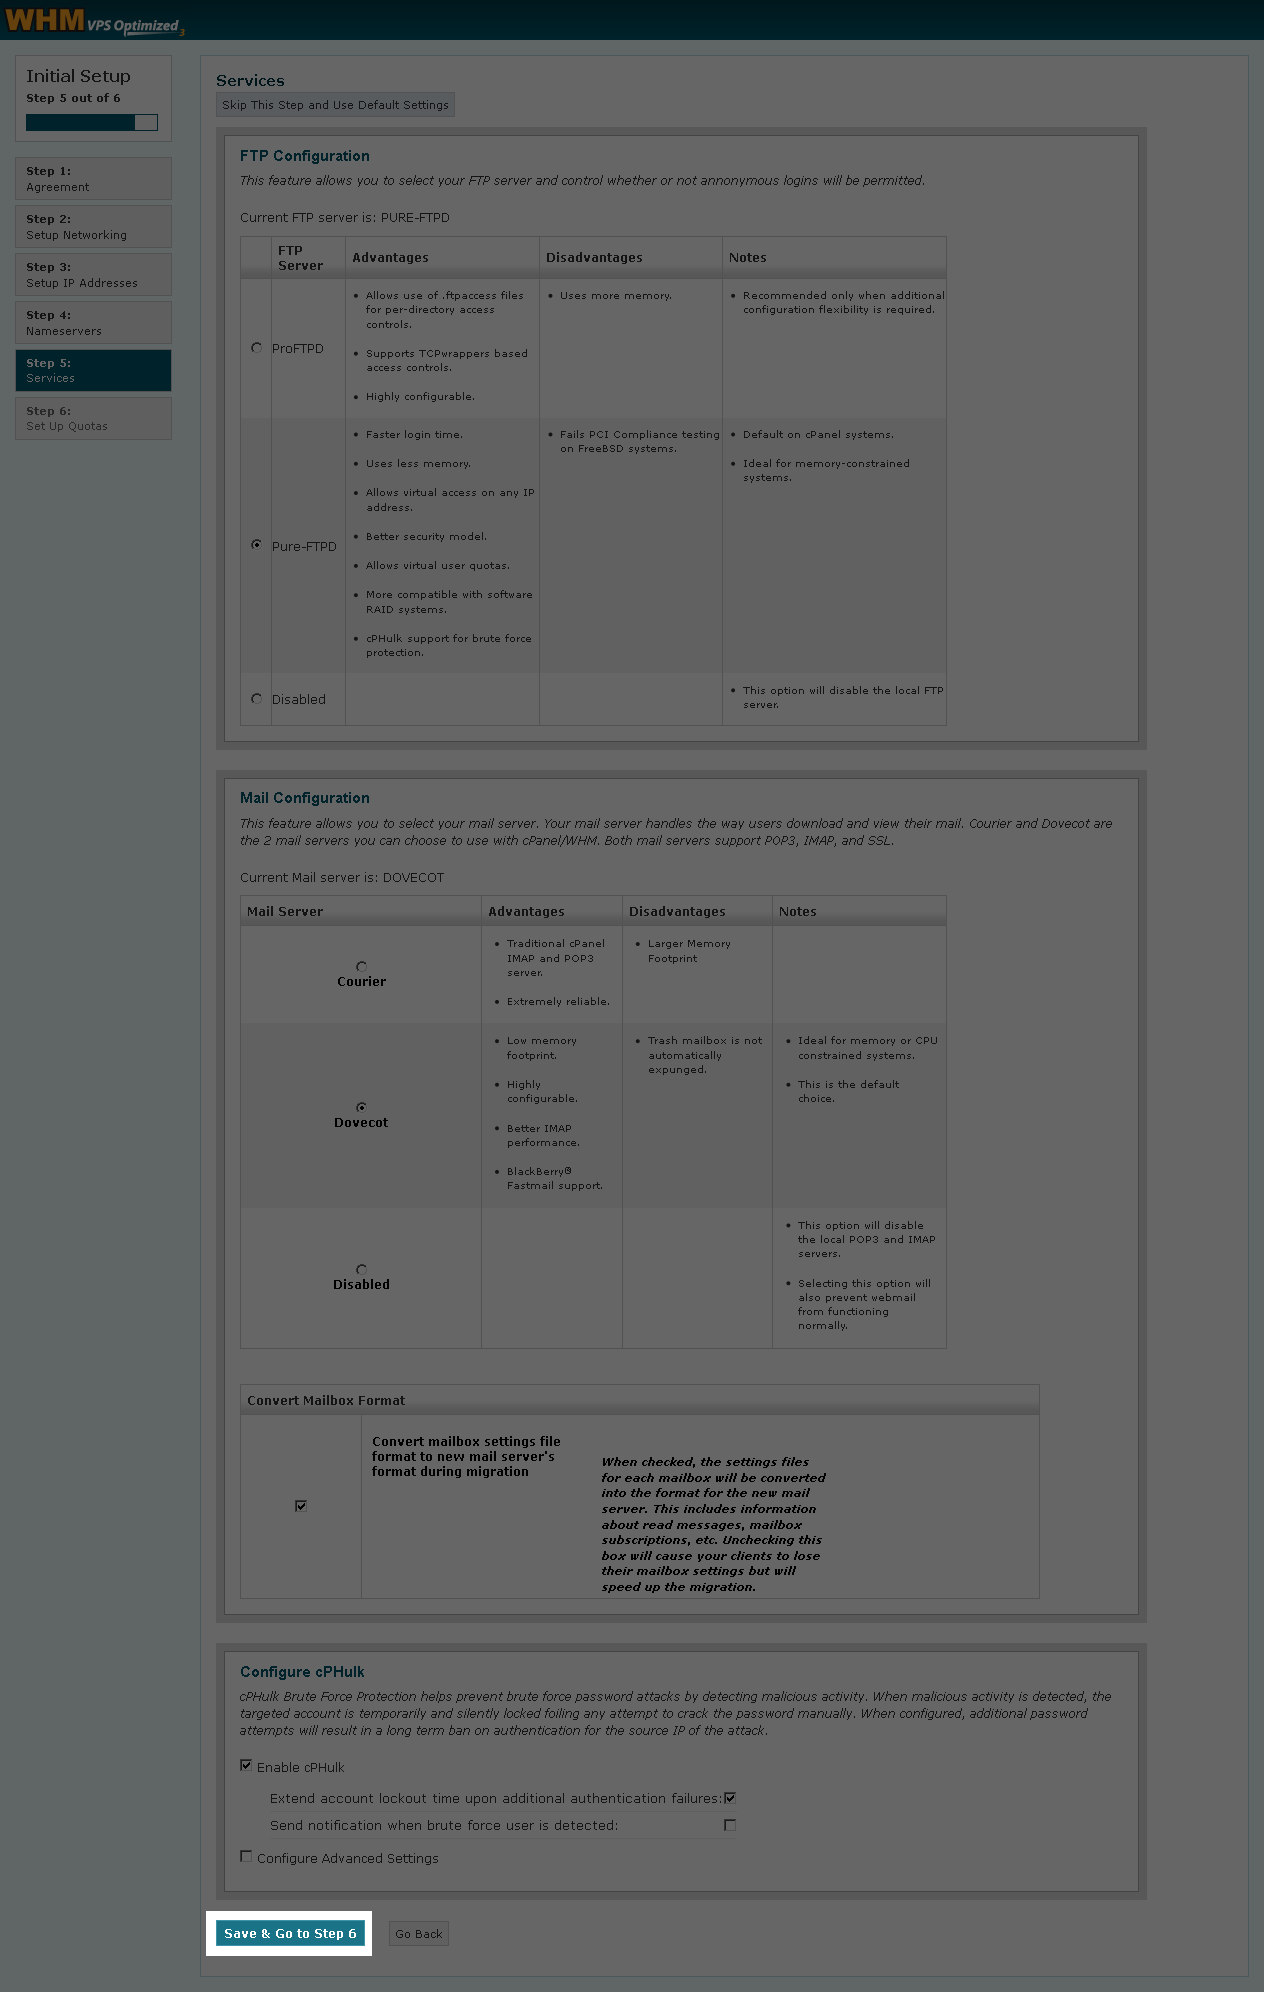
- Click Save & Go to Step 5, and then click Save & Go to Step 6.
- Click Finish Setup Wizard.


2. Configuring Your Server Using WHM
Now that WHM is set up, you need to configure it to work properly with WHMCS. If you took a break since the previous section, you'll need to log back in to WHM.
To Configure Your Server Using WHM
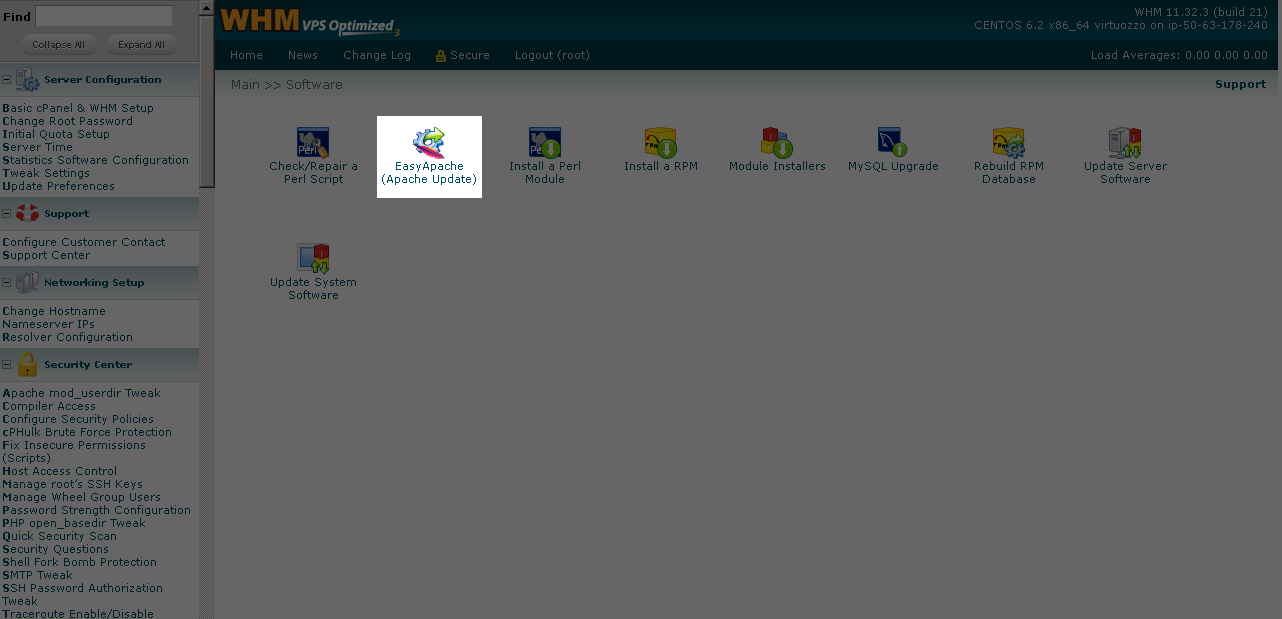
- From the Main Menu, click Software, and then click EasyApache (Apache Update).

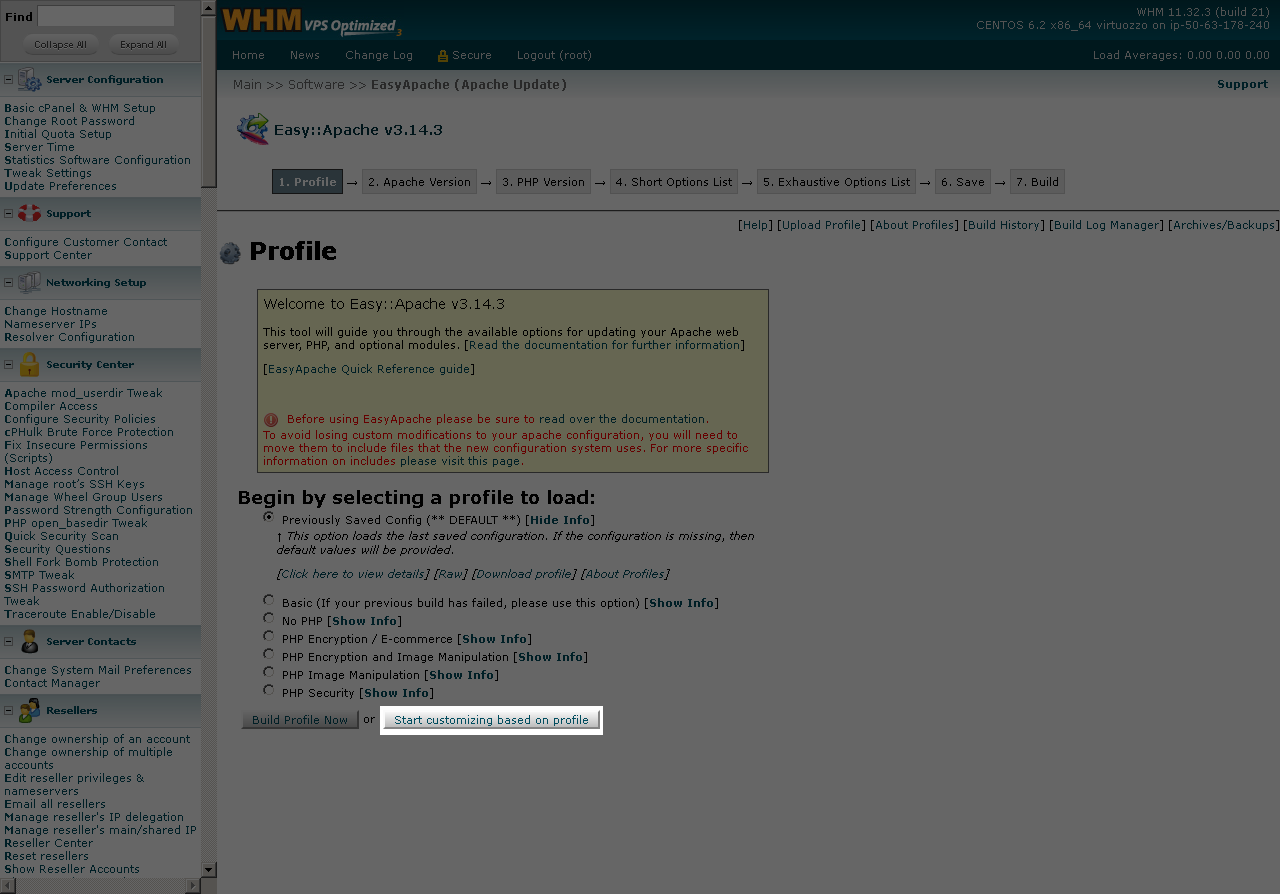
- Select Previously Saved Config, and click Start customizing based on profile.
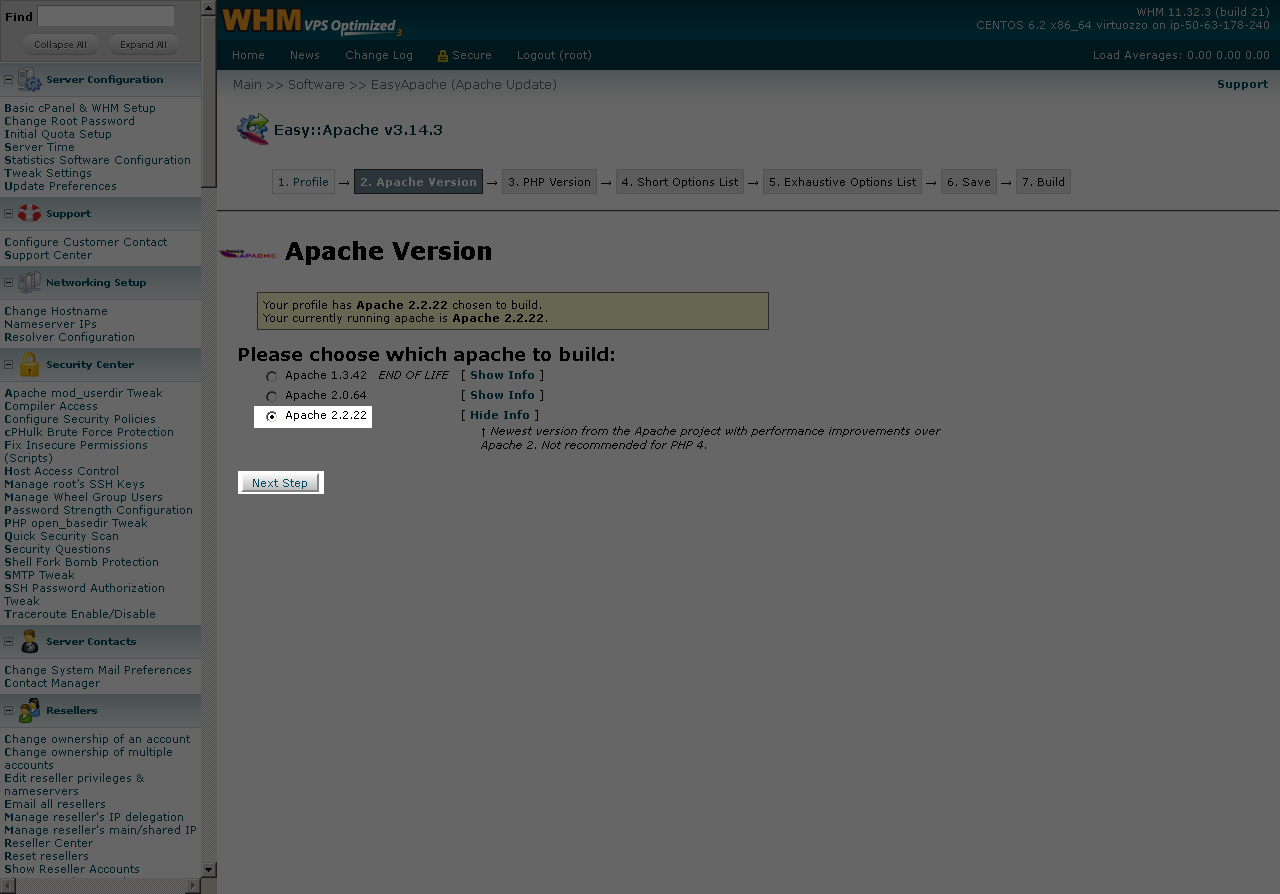
- Select the latest version of Apache, and then click Next Step.
- Depending on your operating system, complete one of the following:
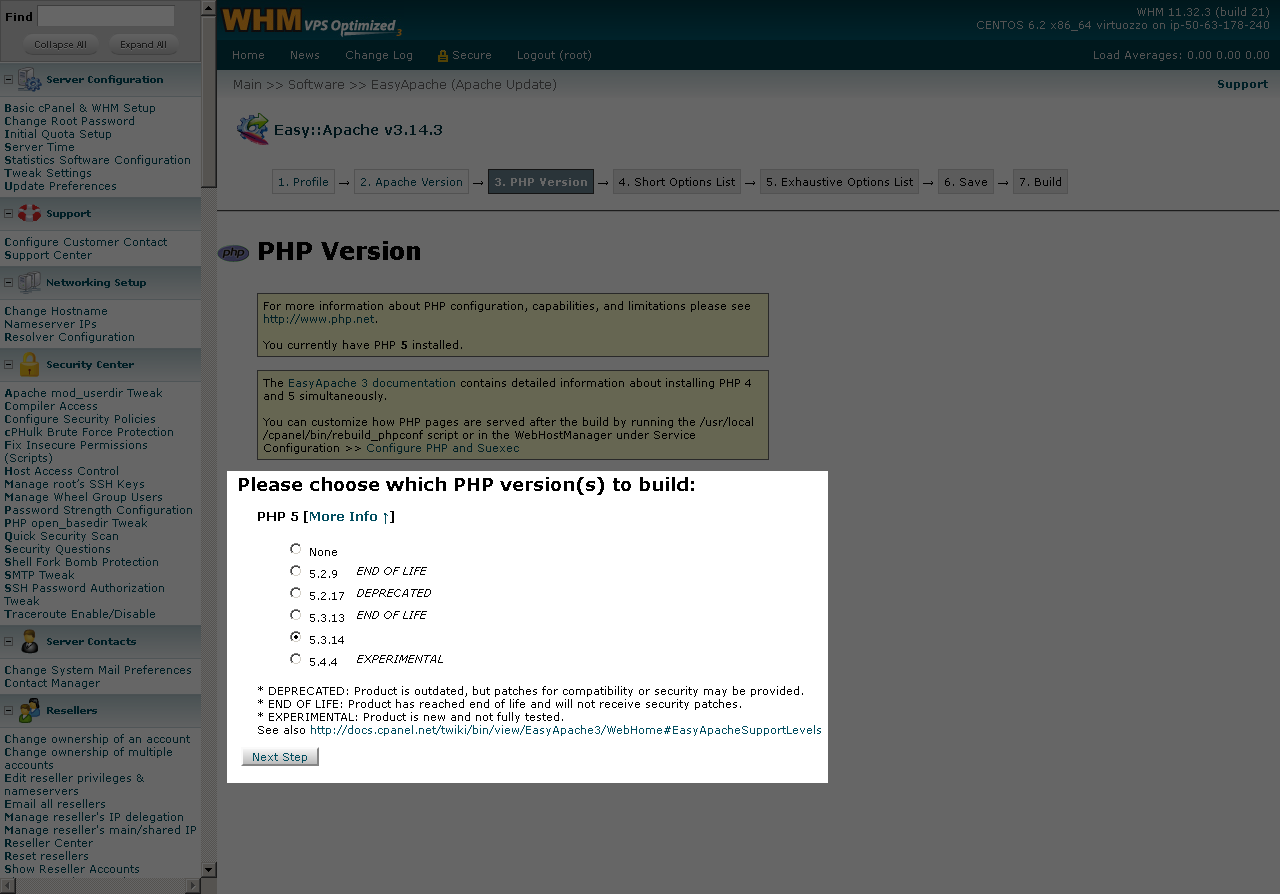
- CentOS 5 — Select None for PHP 4, and then select the latest non-experimental version of PHP 5.
- CentOS 6 — Select the latest non-experimental version of PHP 5.
Warning: Unless you select the correct options for PHP settings, you cannot install the IonCubeLoader outlined in the next steps.
- Click Next Step.
- Make no changes on the Short Options List page. Scroll down and click Exhaustive Options List.
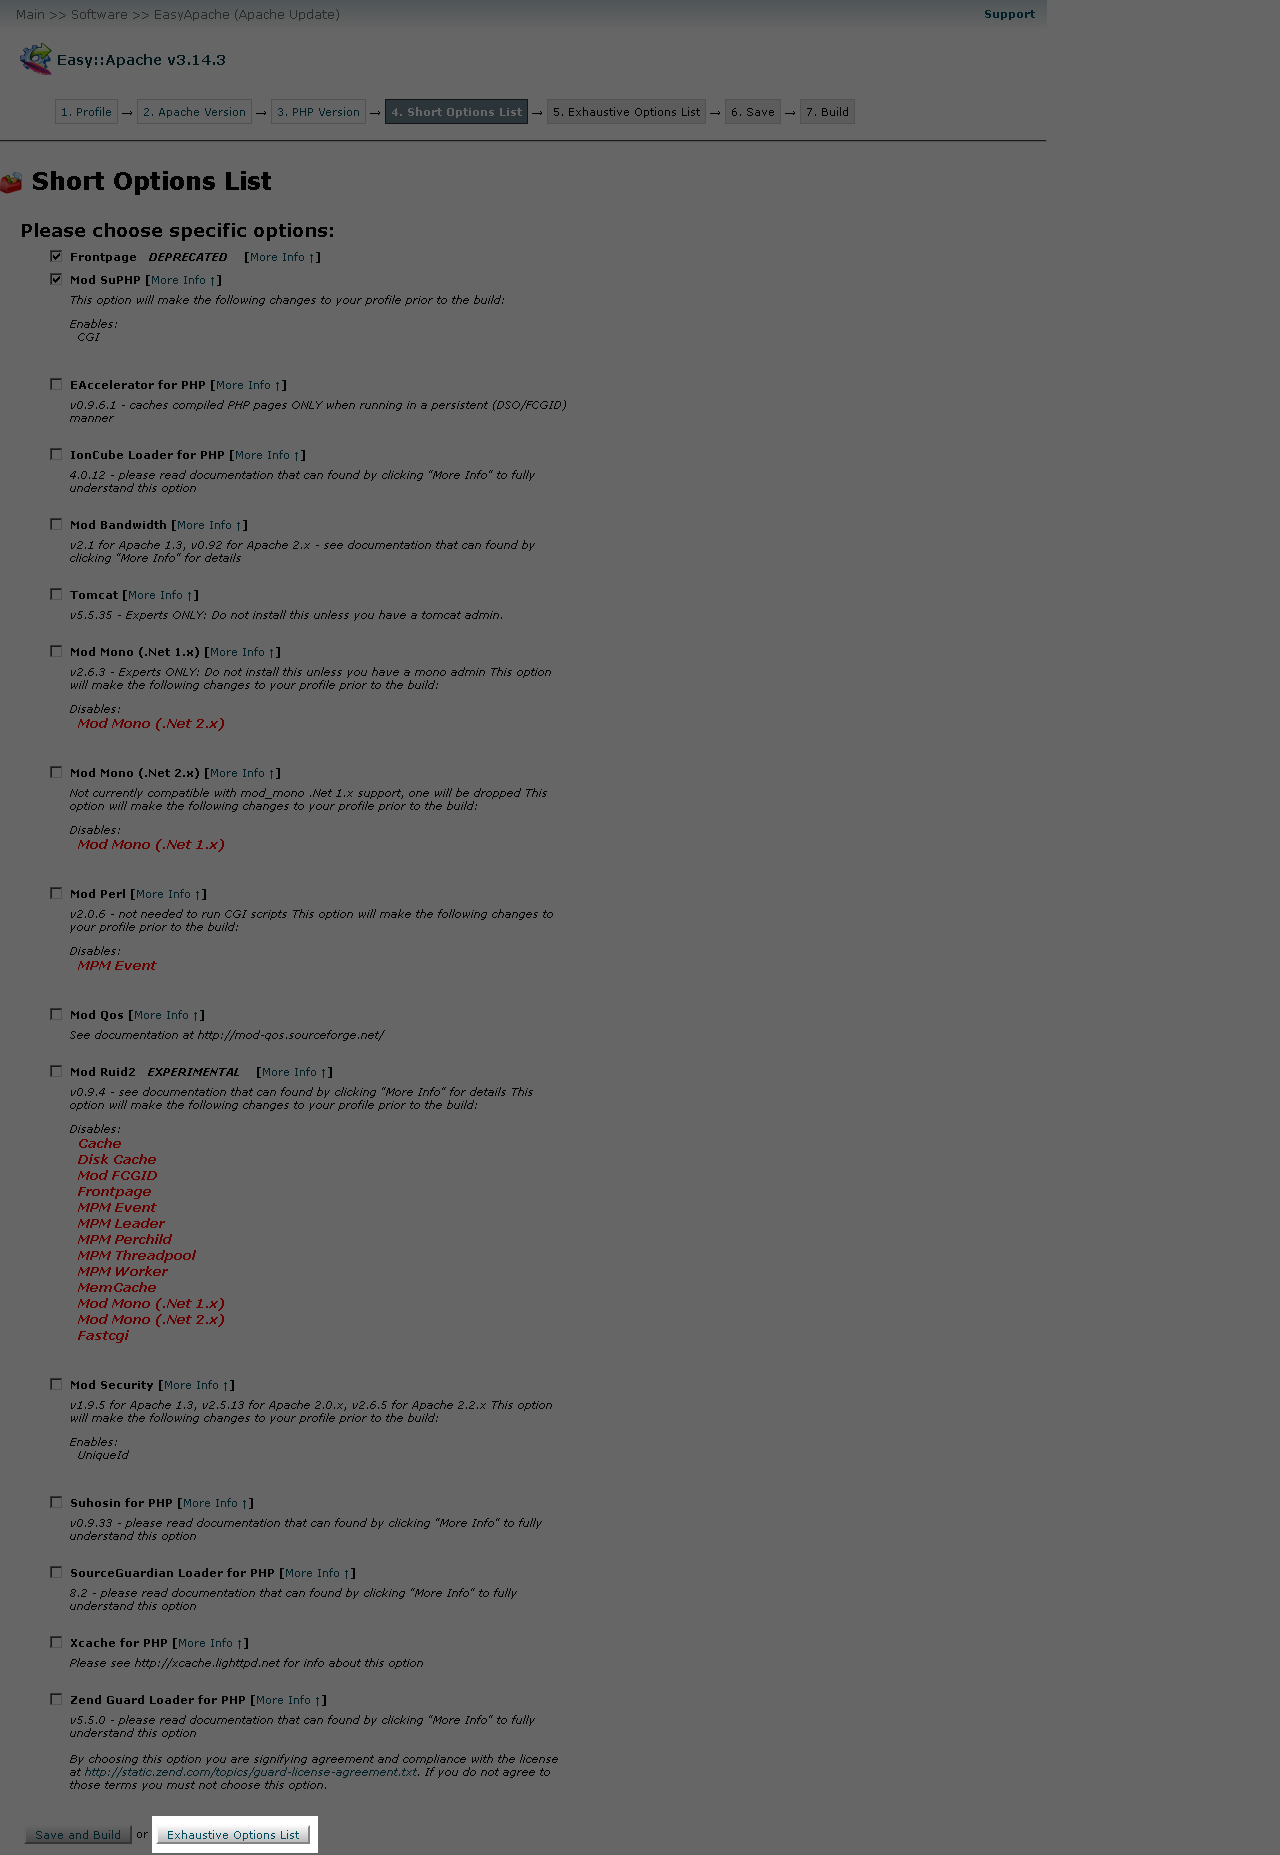
- In the Other Modules section, select IonCubeLoader for PHP, and then click OK.
- In the PHP section, select GD, and then click OK.
- Click Save and build.

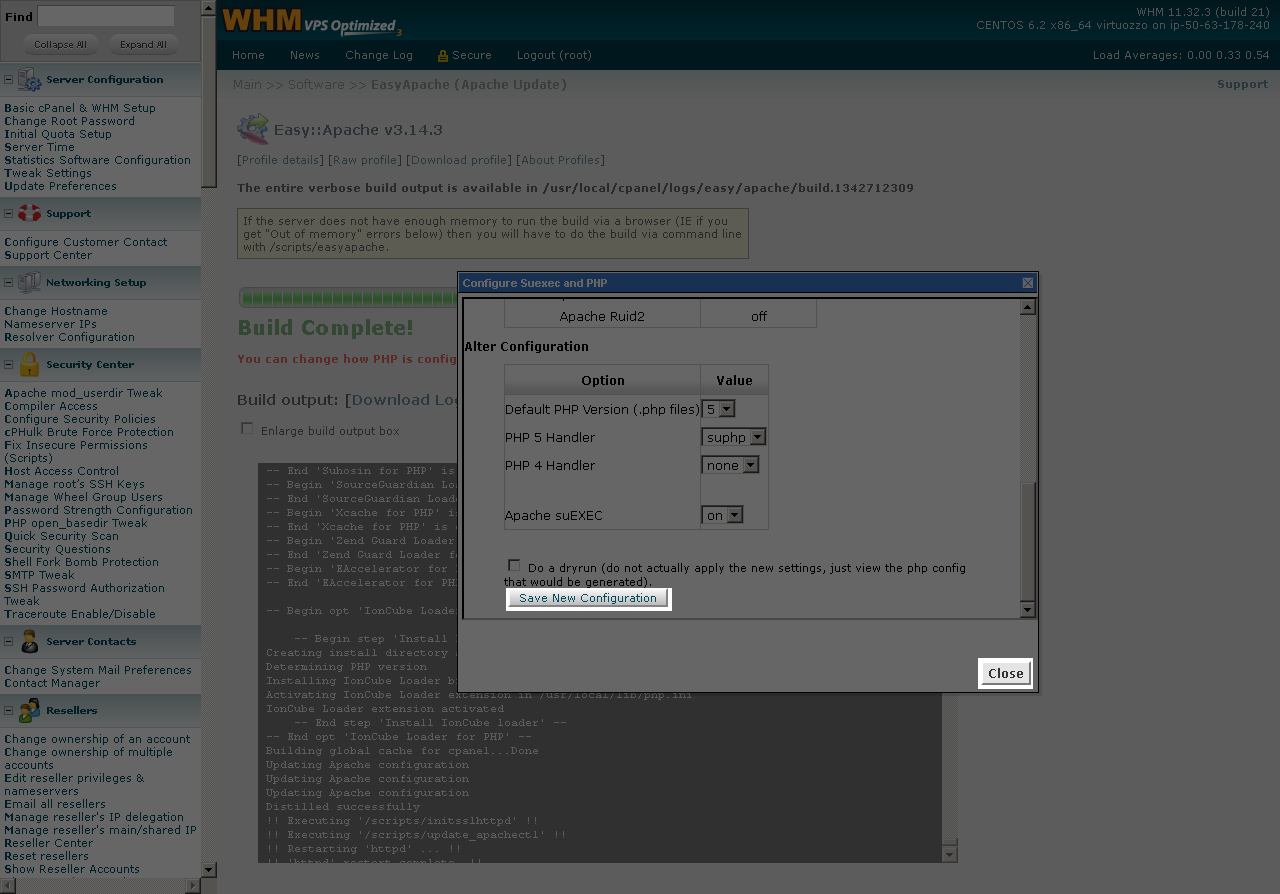
- Click Yes to recompile Apache and PHP now, and then click I Understand.
Note: The build process takes approximately 15 minutes to complete. You will need to wait until this process completes.
- Click Save new configuration, and then click Close.
3. Configuring Your Domain Name and Creating a Product Package
Now you need to set up a domain name. If you took a break since the previous section, you'll need to log back in to WHM.
To Configure Your Reseller Hosting Domain Name
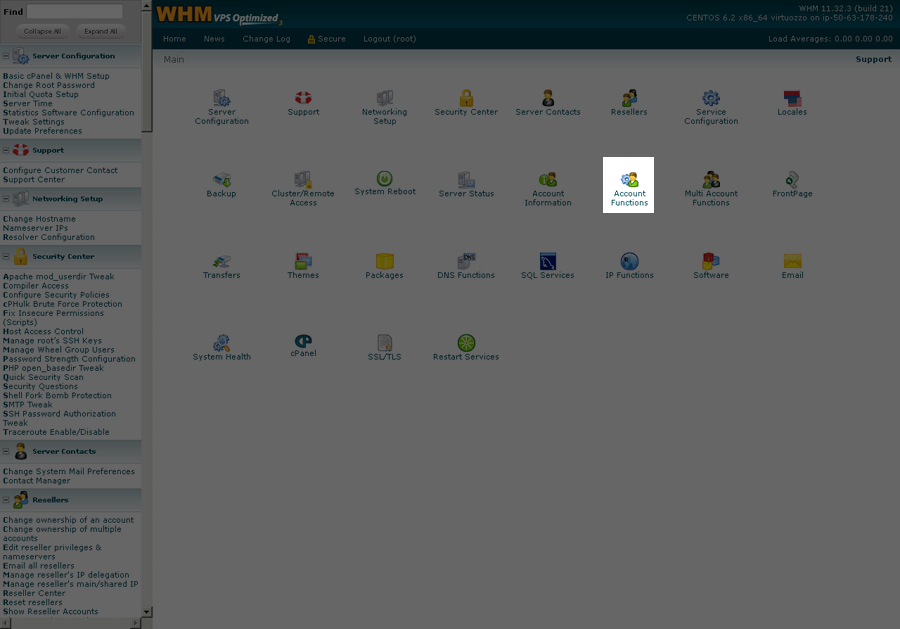
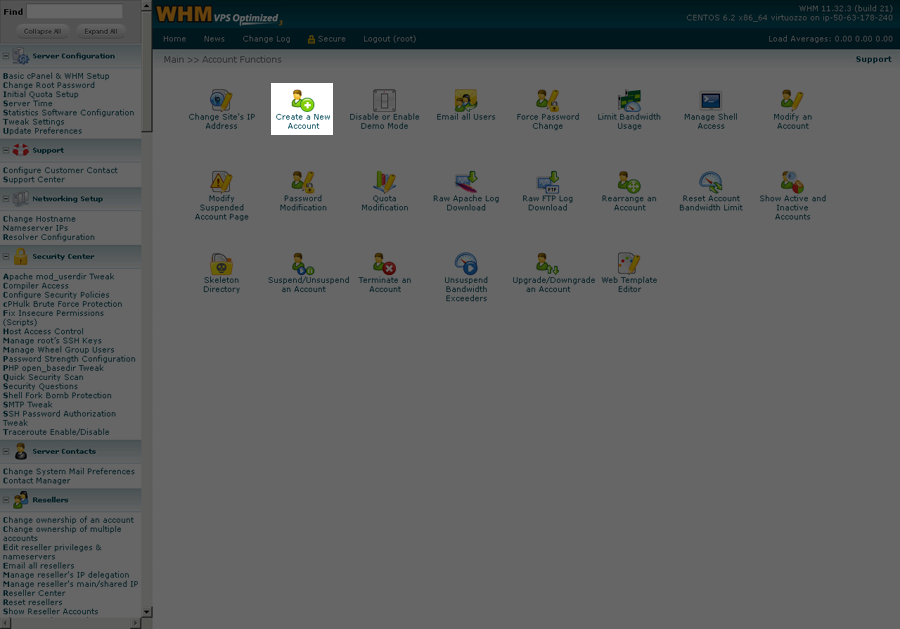
- From the WHM Home page, click Account Functions, and then click Create a New Account.
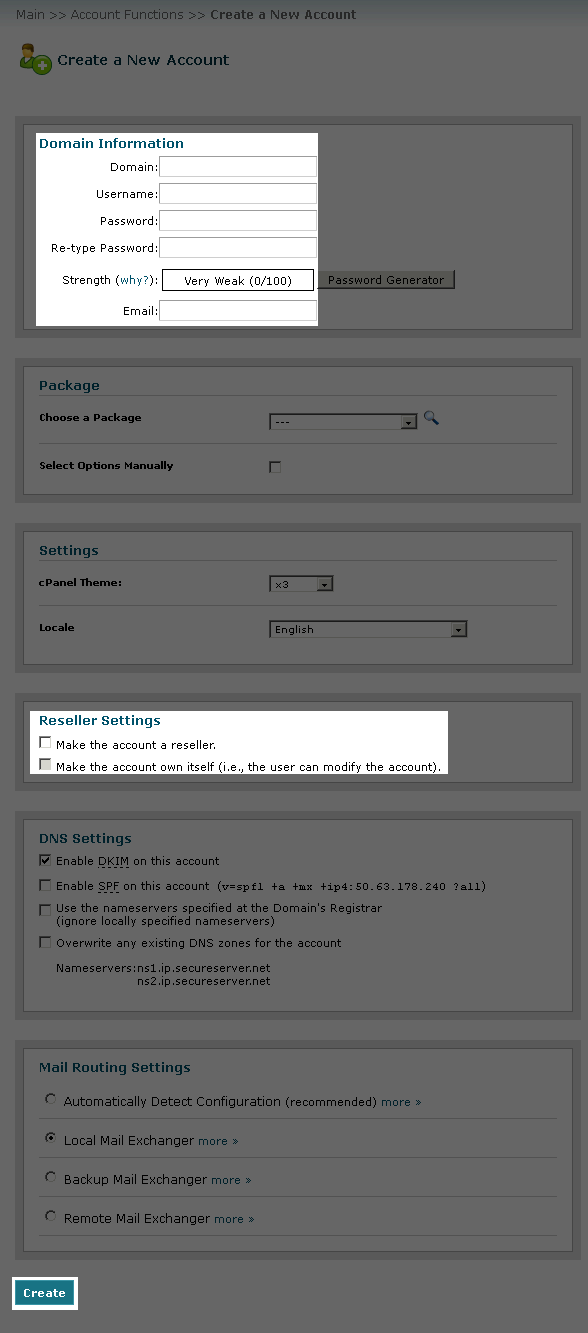
- In the Domain Information section, complete the following fields:
- Domain — The domain name you want to use for your reseller hosting account. Be sure to update the DNS for your domain name so that it points to your server's IP address. For more information, see Setting up Nameserver DNS Using cPanel/WebHost Manager.
- Username — Create a login name for your reseller hosting account.
- Password — Create a password for your reseller hosting account.
- Re-Type Password — Confirm the password for your reseller hosting account.
- Email — Enter an administrative email address of your reseller hosting account.
Note: Save this Reseller User Name and Reseller Password. You need them later.
Warning: The domain name you enter in this area is transferred to WHM to produce your WHMCS license key. Changing your domain name after you have setup WHMCS breaks your WHMCS license key. Be sure to set up the account using the actual domain name you plan to use for your WHMCS installation. - In the Reseller Settings section, select Make the account a reseller and Make the account own itself, and then click Create.
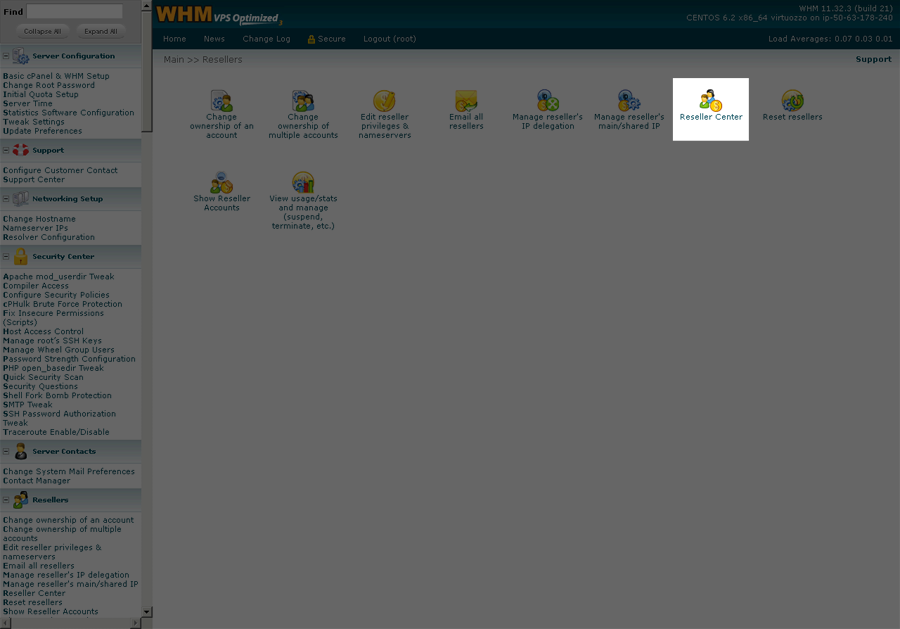
- Return to the Home page, click Resellers, and then click Reseller Center.

- In the Reseller Modifications section, select your reseller from the drop-down list, and then click Edit Privileges/Nameservers.
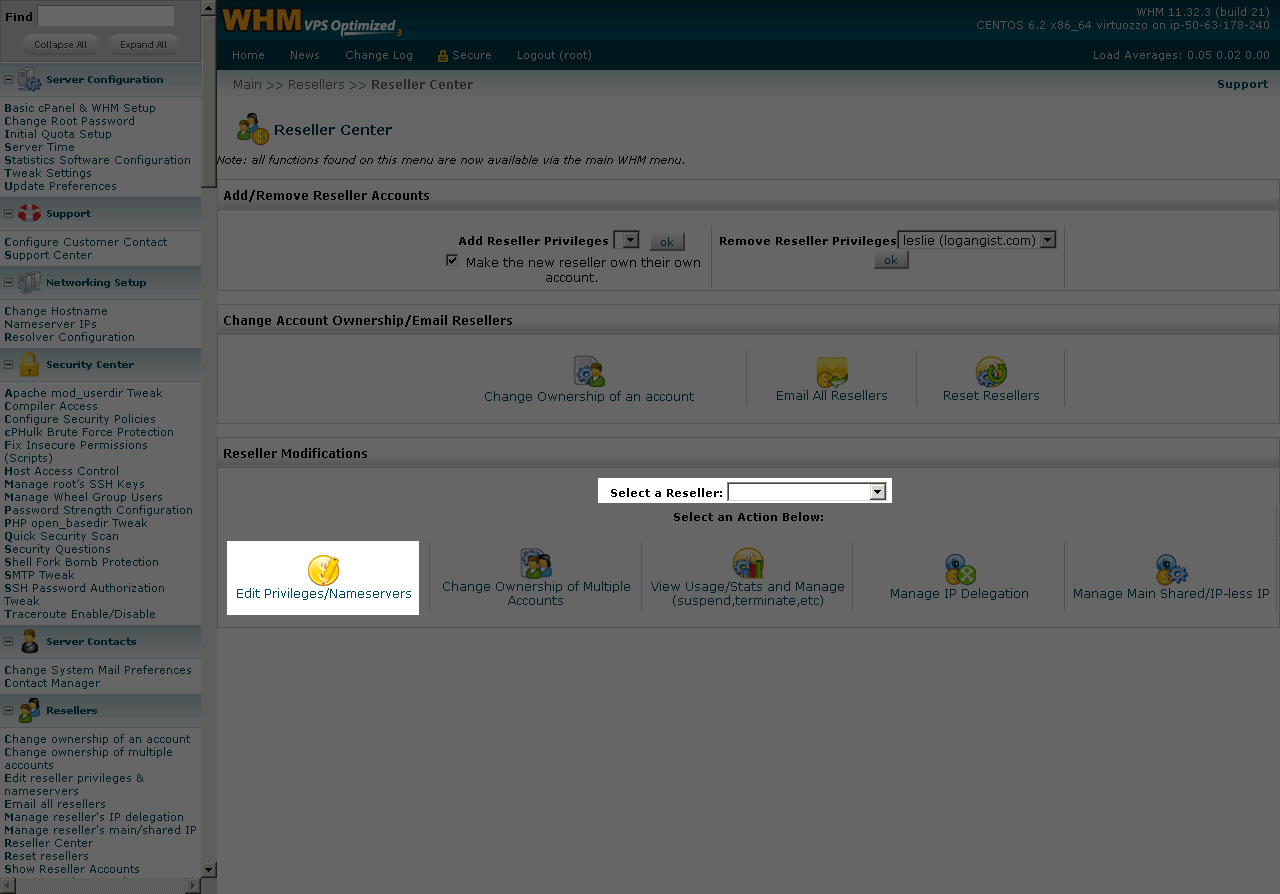
- For Standard Privs and Package Privs, click Add All, and then click Save All Settings.
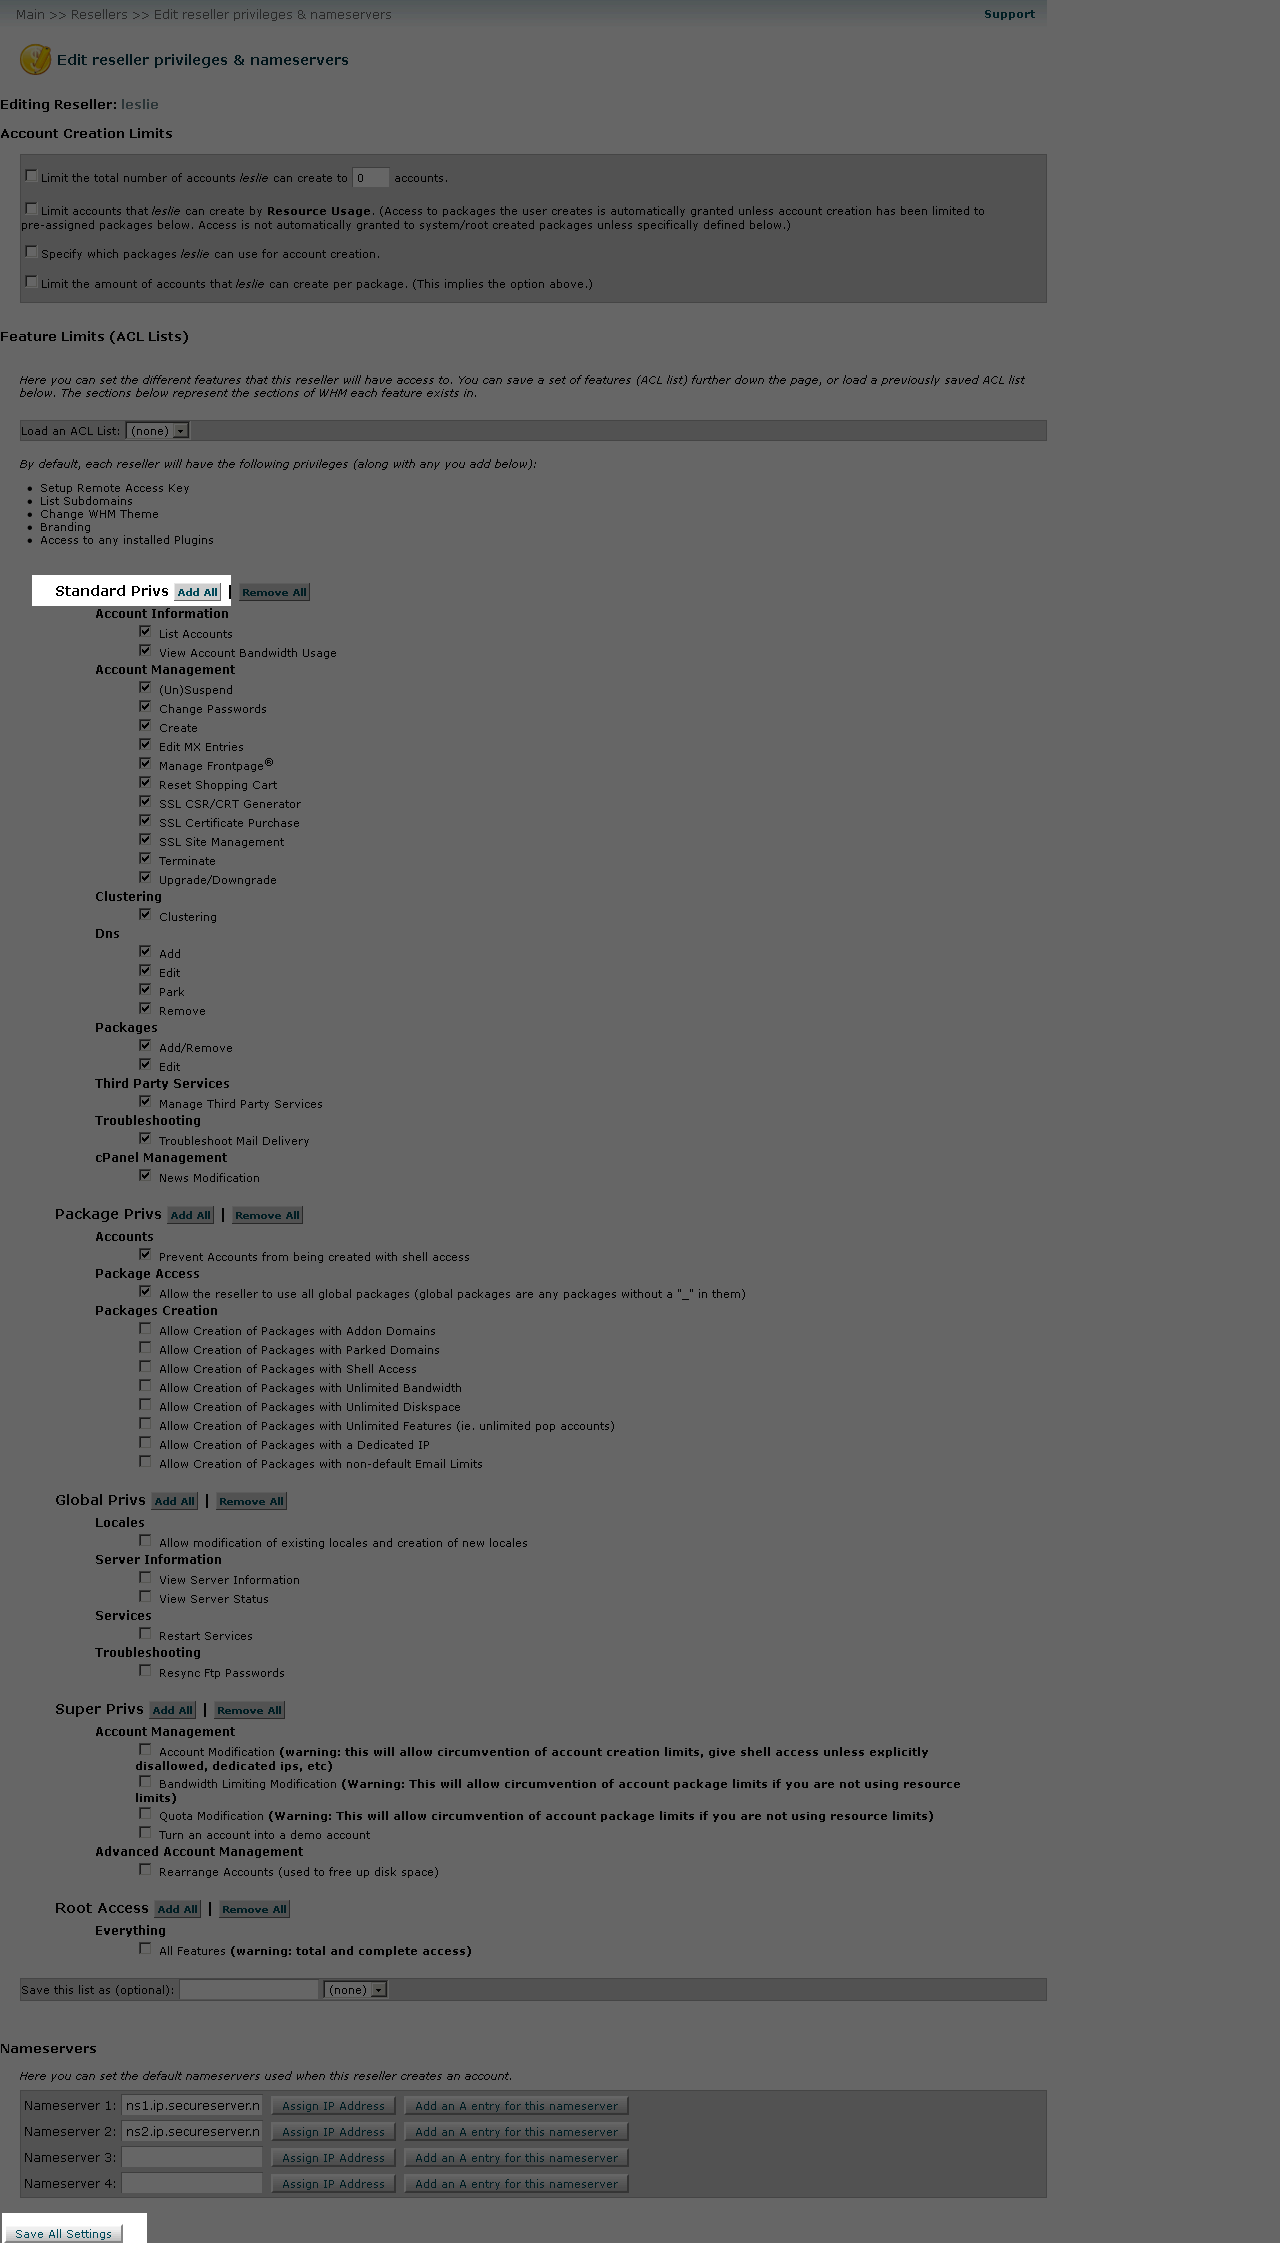
Note: There are many options for configuring reseller privileges on this page. You might not want to configure your reseller account with the same privileges used in this example.
- Return to the Home page, click Packages, and then click Add a Package.
- For this example, we will create a basic 2 GB hosting package. In the Package Name field, enter a name for a specific product offering. The name must begin with the Reseller Username followed by an underscore, and then a name to help you identify the package. The Package Name cannot contain spaces.
For example, resellerusername_2gbNote: Save the Package Name you created. You need it later.
- In the Resources section, select Disk quota (MB), and then enter how much space you want to offer with this product offering. For this example, because we want to create a 2 GB package, enter 2048.
- Click Add.
- Click Logout.
4. Creating a MySQL Database for WHMCS
Now, you need to create a MySQL database under your reseller domain for your WHMCS. You will complete this process in cPanel.
To Create a Reseller Hosting MySQL Database
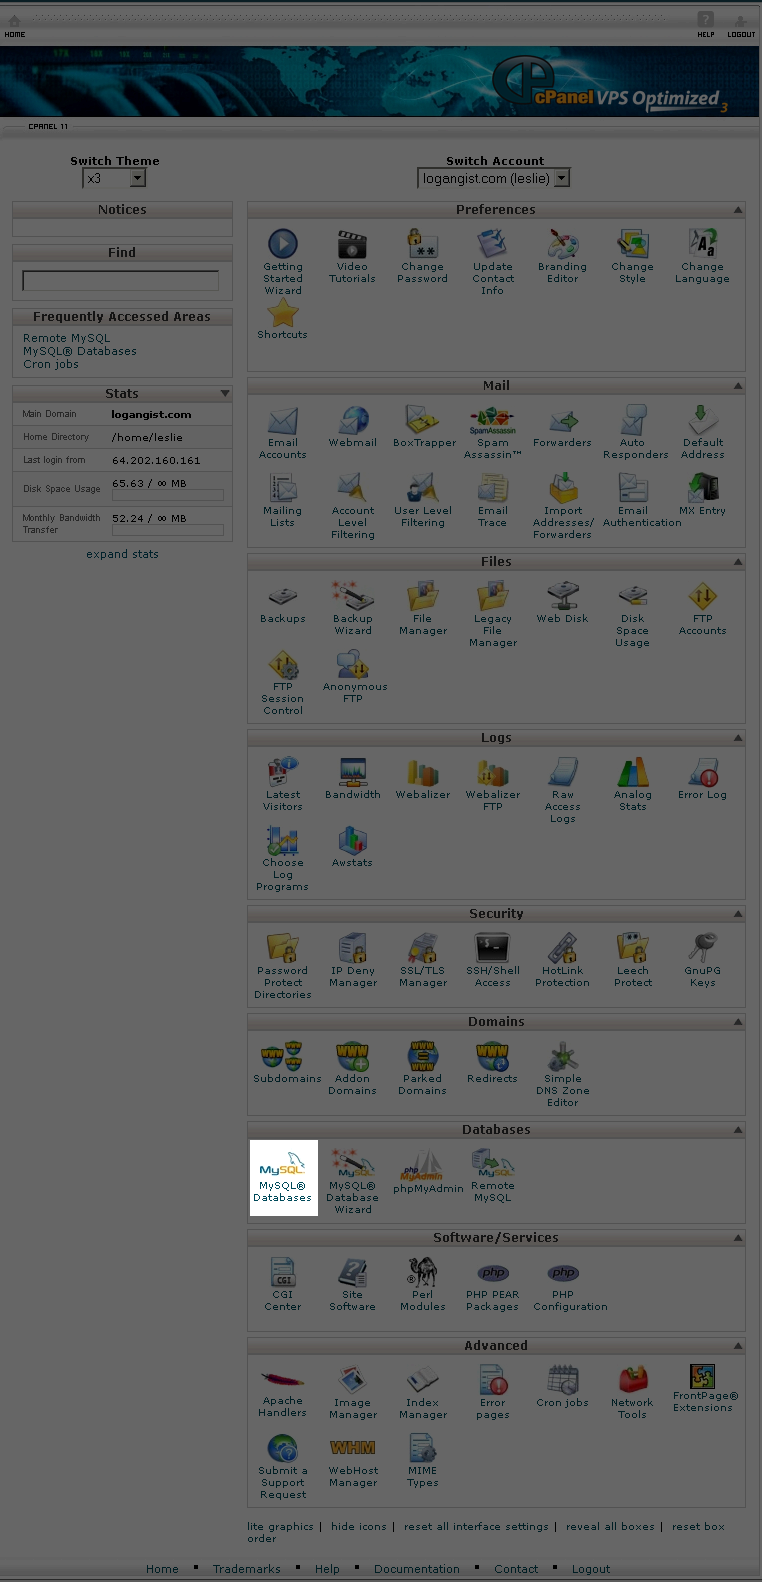
- Log in to cPanel. Open a Web browser and go to:
https://ipaddress:2083/ (ipaddress is your server's IP address). - When the cPanel login screen displays, enter your Reseller User Name and Password, and then click Log in.
- In the Databases section, click MySQL Databases.
- Enter a name for the database, and then click Create Database.
- Click Go Back.
- In the MySQL Users section, create a MySql username and password, and then click Create User.
Note: Save this Database Name, Database Username, and Database Password. You need them later.
- Click Go Back.
- In the Add User to Database section, select the User and Database created in the previous steps, and then click Add.
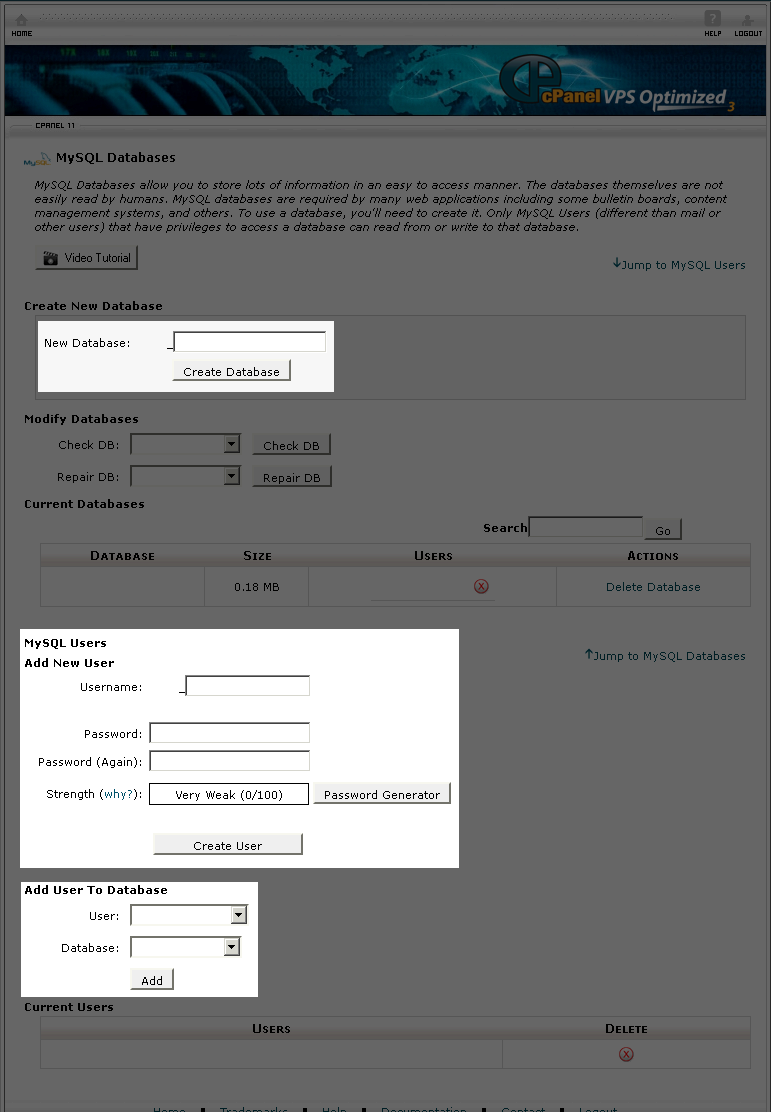
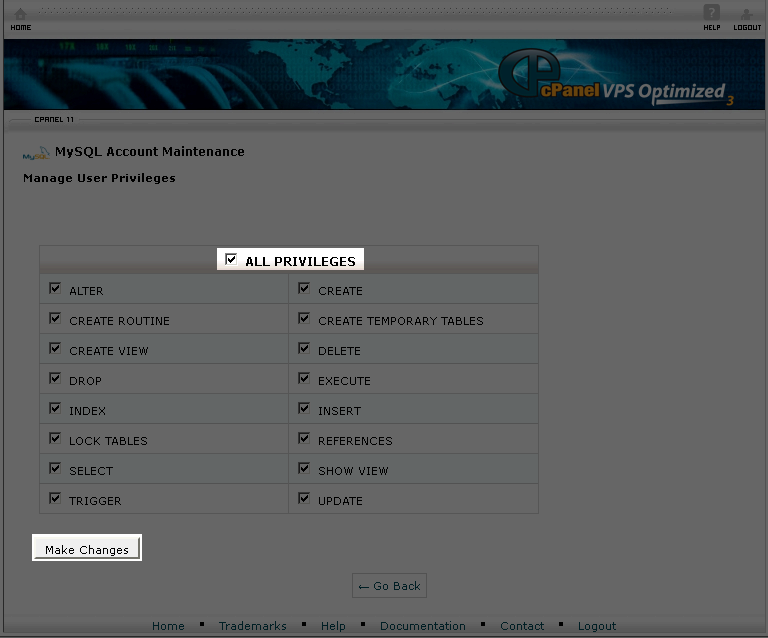
- Select All Privileges, and then click Make Changes.
- Click Go Back, and then click Logout.
5. Preparing for WHMCS Installation
Next, you need to get everything ready for the WHMCS installation. WHMCS is the all-in-one client management system for reseller hosting. With WHMCS you can set up billing, hosting packages, payment gateways, server provisioning APIs, domain registration and fraud protection services.
Before you install WHMCS, you need to retrieve the WHMCS License Key and Hostname of your Virtual Private Server (VPS). Then, you need to download WHMCS and the most recent security patches.
To Get Your Hostname
- Log in to your server using SSH. For more information, see Log in to my server.
- Type the following command:hostname
- Save the host name that displays as your Server Hostname.
To Get Your WHMCS License Key and Download WHMCS
- Begin by logging in to the client area at http://www.whmcs.com/members/clientarea.php or obtain the latest version from your Web host if you received your key from them.
- Navigate to Services > Licenses & Services.
- Select one of your active license keys, and then click View Details.
- Go to the Downloads tab.
- Download the latest WHMCS to your local machine.
6. Installing WHMCS
Now, you can install WHMCS onto your server.
To Install WHMCS
- Unzip the WHMCS installation .ZIP file that you previously downloaded on your local machine.
- (Optional) Depending on personal preference, you can rename the whmcs directory to a different name of your choice. This changes the URL your customers use to access your WHMCS storefront. For example, if you rename the directory to clients, the URL changes to http://www.coolexample.com/clients (where coolexample.com is your domain name).
For documentation purposes, we'll continue to refer to this directory as whmcs.
The directory you choose is transferred to WHM to produce your WHMCS license key. Changing your directory name after you have setup WHMCS breaks your WHMCS license key. Be sure to choose the actual directory name you plan to use for your WHMCS installation. - In the whmcs directory, rename the file configuration.php.new to configuration.php.
- Connect to your server with an FTP client using the following credentials:
- Host — your Server IP Address
- Username — your Reseller User Name
- Password — your Reseller Password
- Upload the entire whmcs folder to the public_html directory.
- Using an Internet browser, go to http://www.coolexample.com/whmcs/install/install.php to run the installation process (where coolexample.com is your reseller domain name).
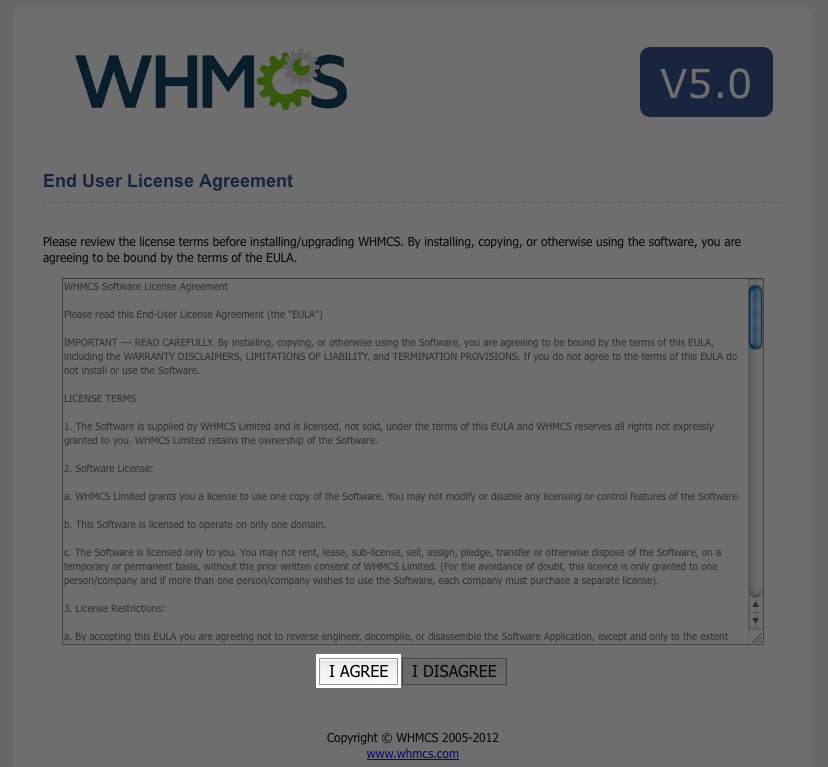
- Click I Agree to agree to the End User License Agreement.
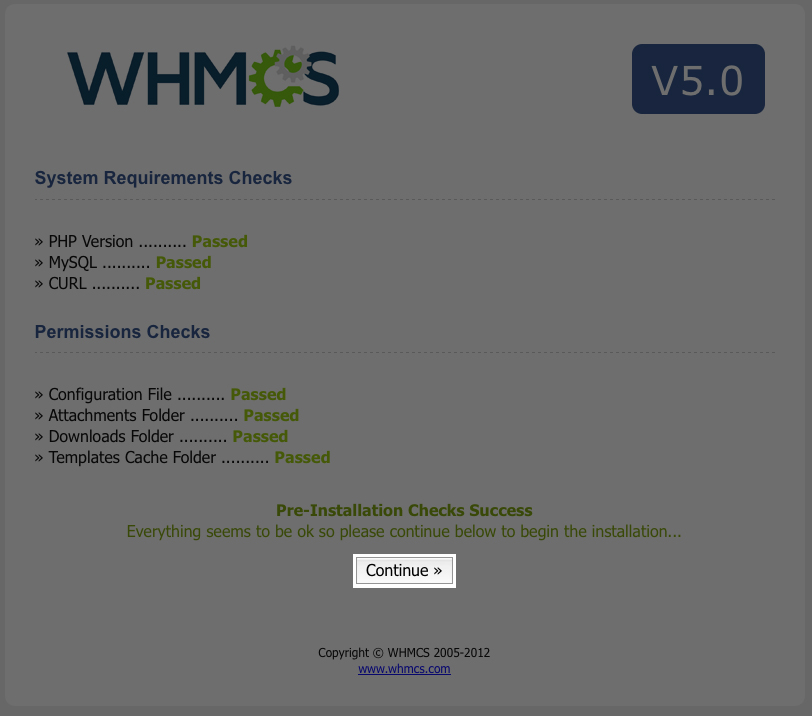
- Click Continue.
- Enter your WHMCS License Key, Database Username, Database Password, and Database Name.
- Click Continue.
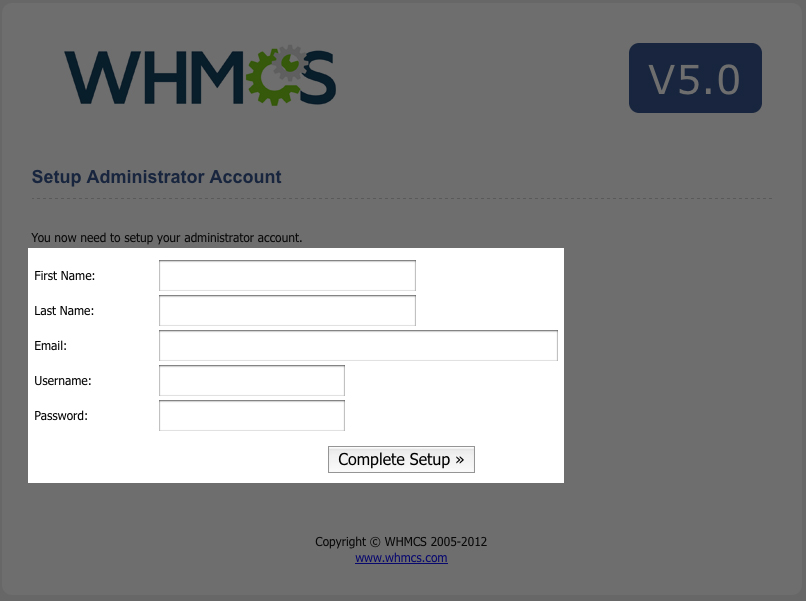
- Enter your administrator information for First Name, Last Name, Email, create a Username, and then create a Password.
Note: Save this WHMCS User Name and WHMCS Password. You need them later.
- Click Complete Setup.
- In the Setup Daily Cron Job section, save the Cron Job Command. You need it later.
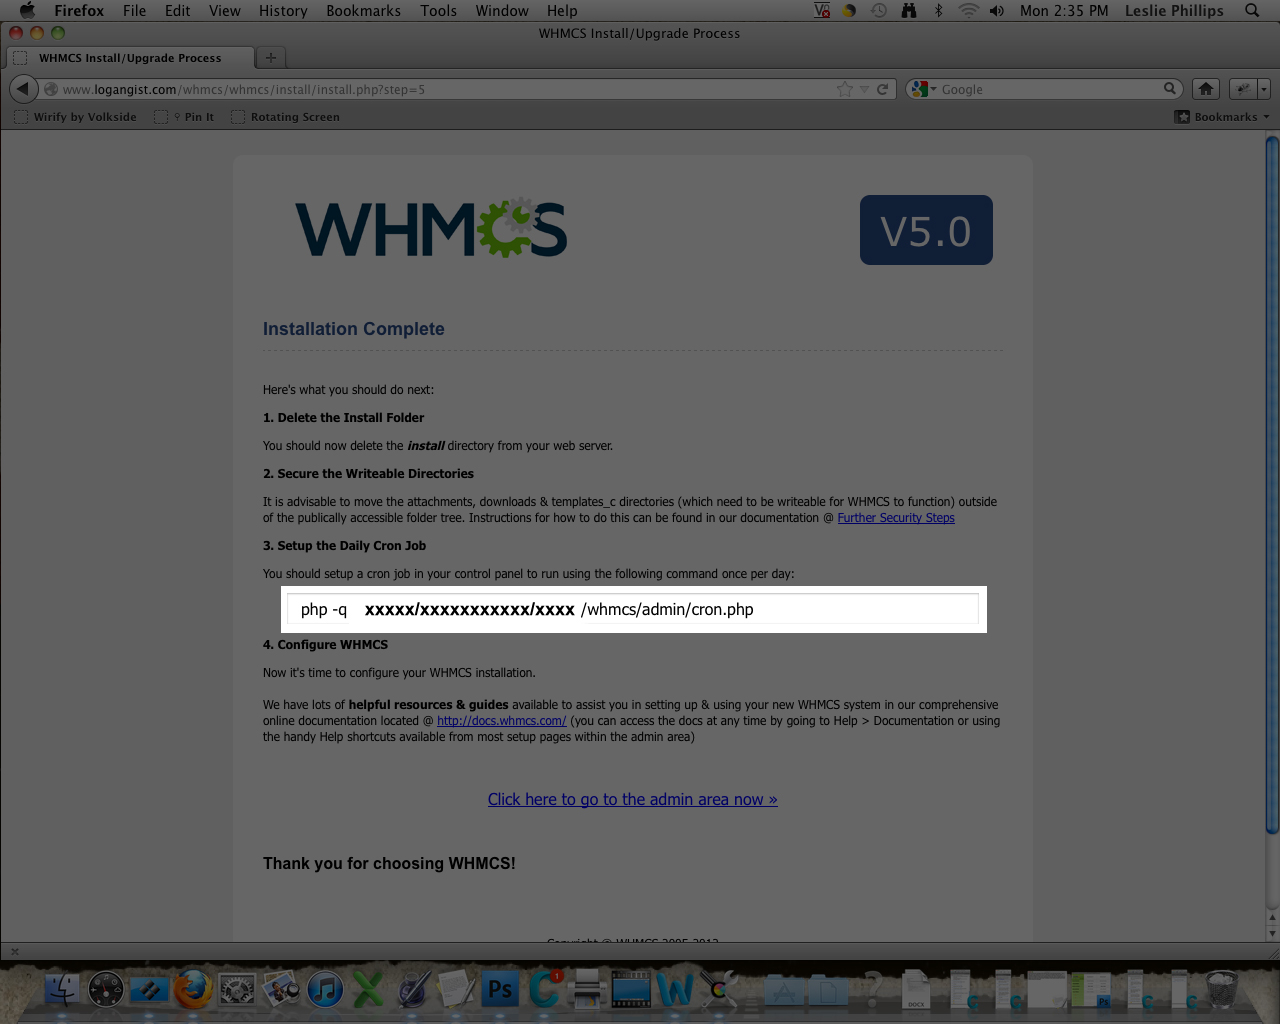
- Return to your FTP client and delete the install folder from the whmcs directory.
- Log in to cPanel using your Reseller User Name and Password. Open a Web browser and go to:
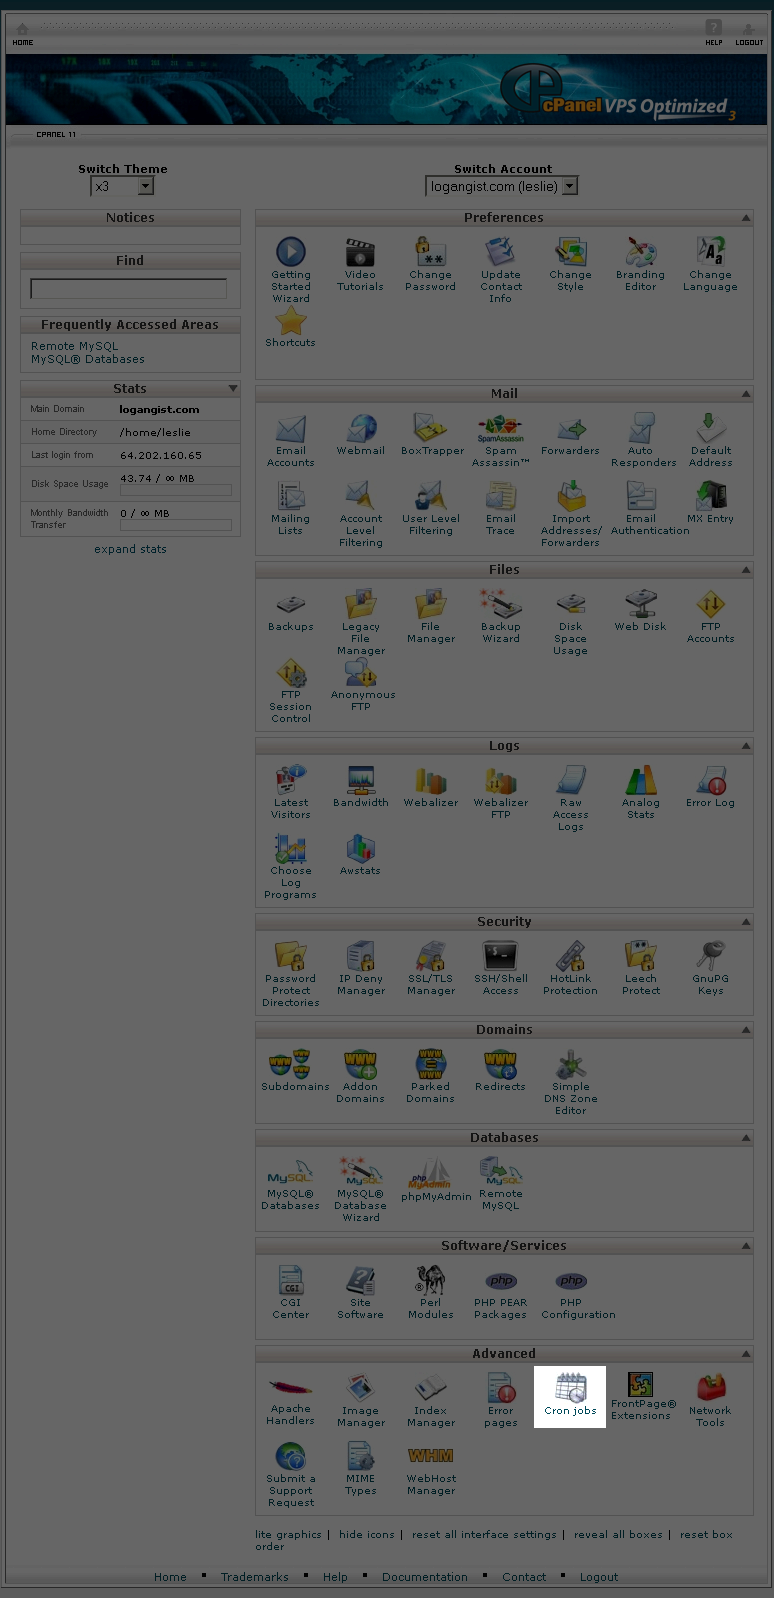
https://ipaddress:2083/ (where ipaddress is your server's IP address). - In the Advanced section, click Cron jobs.
- From the Common Settings drop-down list, select Once A Day.
- Paste the cron command you saved during WHMCS installation in the Command field.
- Click Add New Cron Job.

7. Configuring WHMCS
WHMCS gives you many configuration options. For this guide, we only adjust those settings needed to use the 2 GB hosting package created earlier.
For more detailed information about all of the available WHMCS configuration options, see docs.whmcs.com.
To Configure WHMCS
Log in to WHMCS and Configure General Settings
- Log in to the WHMCS admin area using your WHMCS User Name and Password, log in to the admin area of WHMCS located at:
http://coolexample.com/whmcs/admin (where coolexample.com is your domain name, and whmcs is your custom whmcs directory). - From the Setup menu, select General Settings.
- Complete the General Settings fields, and then click Save Changes.
Configure Your Server
- From the Setup menu, select Products/Services, and then select Servers.
- Click Add New Server.
- Complete the following fields:
- Name — Enter a friendly name for your server.
- Hostname — Enter your Server Hostname.
- IP Address — Enter your Server IP Address.
- Primary Nameserver — Enter ns1.ip.secureserver.net and 208.109.188.1 for the IP address (or your custom nameserver info).
- Secondary Nameserver — Enter ns2.ip.secureserver.net and 208.109.188.2 for the IP address (or your custom nameserver info).
- Type — Select cPanel.
- Username — Enter your Reseller User Name.
- Password — Enter your Reseller Password.
- Secure — To continue, you must select to use SSL mode for connections.
- Click Save Changes.
Configure Products
- From the Setup menu, select Products/Services, and then select Products/Services.
- Click Create New Group.
- Create a name for your product groupings (for example, Shared Hosting), and then click Create Group.
- Click Create New Product.
- From the Product Type drop-down list, select Hosting Account.
- From the Product Group drop-down list, select the product grouping you created.
- In the Product Name field, create a name for your new product (for example, Shared Hosting - 2 GB Disk Space.)
- Click Continue.
- Click Module Settings.
- From the Module name drop-down list, select cPanel.
- In the WHM Package Name field, enter the Package Name you created earlier. Do not change any other settings.
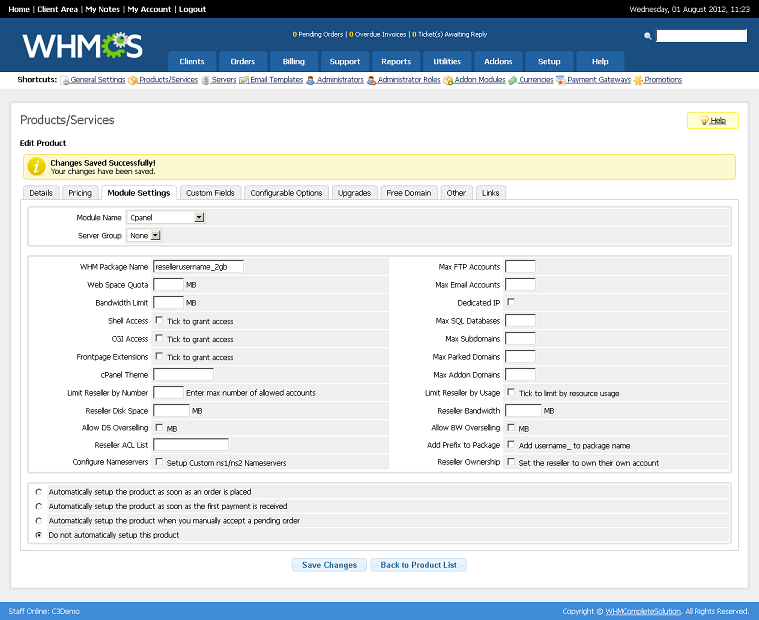
- Select Automatically setup product when you manually accept a pending order.
- Click Save Changes.
After completing these steps, you should be able to browse to
http://coolexample.com/whmcs (where coolexample.com is your Reseller Hosting domain name) and see WHMCS in action as a potential customer would. You can click Order link to see your products.
There are additional measures you can take to help secure your website and WHMCS installation. For more information, see Securing WHMCS Installations.
Beyond this guide, there are many customizable options within WHMCS. To get the most out of WHMCS, you might need to learn more about creating payment gateways and managing your orders. For more information, see the WHMCS website.
