Edit image
Once you add an image to a page, you can resize it, crop it, or replace if you like. You also can add an ALT tag to the image to meet accessibility guidelines for the visually impaired — and improve your site's search engine rank.
- Log in to your ITEGY account.
- In your Products list click Website Builder, and then click Manage next to the account you want to use.
- Click Edit Site.
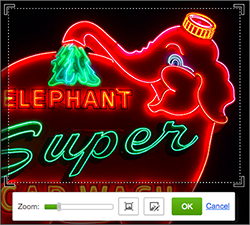
- Double-click the image to display the zoom and crop tools.
- Drag the Zoom slider to show just part of the image, while preserving its overall proportions.

Note: To return the photo to its "unzoomed" size, drag the slider to the far left. Clicking the button next to it resets the image to the file's original dimensions, which are often larger than the frame you created with the Image tool.

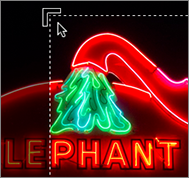
- To crop the image, double-click anywhere in it and reposition any corner's crop marker.

- To reposition the image within the crop or zoom frame, click and drag the image.
Note: You cannot rotate an image within Website Builder. Do this in your default image editor before you upload the image.
- Click anywhere outside of the image into blank space to save the cropping.
- To make other changes to the image, click the image and click a button in the image toolbar:

Image editor toolbar Button Name Action 
Replace Image Opens Choose Photos window. 
Crop Image Crops image; explained in Step 5 above. 
Image Editor Opens the Advanced Image Editor, available only in Business and Business Plus Website Builder Plans. 
Make a Copy Duplicates the image and places it overlapping the original. 
Settings Opens the Settings window, where you can use the Image Settings tab to link images to pages or apply various edge styles.
This is also where you can add an ALT tag, used by screen reading programs to describe the image for the visually impaired and often required under accessibility guidelines. This also improves your site's rank in search engine results.
Delete Removes the image 
More Displays a menu of other options, including controlling layers and locking image's position. - Click Publish to update your site online.
